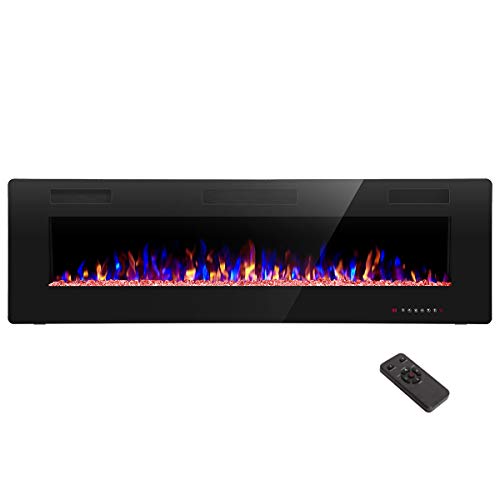
Installing an Electric Fireplace Insert: A Complete Guide
Transform your existing fireplace with a modern, efficient electric insert. This guide covers everything from measuring and choosing the right model to wiring, fitting, and safety. Perfect for homeowners who want the look of a real fire without the mess, venting, or high energy bills.
Why Choose an Electric Insert? Electric fireplace inserts are the easiest way to upgrade an old wood-burning or gas fireplace. They require no chimney, no venting, and produce zero emissions. They are also highly efficient, converting nearly all energy into heat, and many models offer realistic flame effects with adjustable heat settings.
What Exactly Is an Electric Fireplace Insert?
An electric fireplace insert is a self-contained unit designed to fit inside an existing fireplace opening. Unlike a full fireplace remodel, an insert slides into the cavity and uses electricity to generate both flame effects and supplemental heat. It is an ideal solution for converting a wood-burning fireplace or updating a gas unit that is no longer functional. Because it does not require a chimney or gas line, installation is far simpler than other fireplace types, making it a popular choice for DIY electric fireplace projects. Most inserts are available in standard sizes, but you can also find 44-inch electric fireplace inserts and 60-inch ultra-thin models for larger openings.
Types of Electric Fireplace Inserts
Electric inserts come in several configurations, each suited to different installation scenarios. Understanding these types will help you choose the right one for your home.
- Plug-in inserts: The simplest option. They plug into a standard household outlet and require no hardwiring. Ideal for existing fireplace cavities where an outlet is nearby.
- Hardwired inserts: These are connected directly to your home’s electrical system. They offer a cleaner look (no visible cord) and are often used in new construction or when a dedicated circuit is available.
- Built-in inserts: Designed to be enclosed within a wall or surround. They often include a trim kit for a finished look. These are common in best electric fireplace insert for existing fireplace recommendations.
- Freestanding inserts: While less common, some units can be placed inside a fireplace and also used freestanding. They are versatile but may not have the same built-in aesthetic.
When selecting a type, consider the available power source, the size of your opening, and whether you want a permanent or removable installation. For a seamless look, many homeowners choose an insert with a remote control and adjustable flame settings.
Sizing and Compatibility: Getting the Right Fit
Before purchasing, you must measure your existing fireplace opening accurately. Use a tape measure to record the width, height, and depth of the opening. Most manufacturers list the minimum opening dimensions required for their inserts. If your opening is non-standard, you may need a custom surround or a electric fireplace insert into wood burning fireplace kit that includes adjustable trim.
Compatibility is not just about size. If you are replacing a gas fireplace, you must cap the gas line according to local codes. For wood-burning fireplaces, you should clean the chimney and ensure the damper is sealed to prevent drafts. Many inserts are designed to fit standard openings, such as 30-inch freestanding electric fireplace models, but always verify the specifications. If you are unsure, consult a professional to avoid installation delays or safety issues.
Tools and Materials You Will Need
Installing an electric insert is a manageable DIY project. Here is a list of typical tools and materials:
- Tape measure
- Pencil or marker
- Level
- Screwdriver (Phillips and flathead)
- Drill with bits (for hardwired models)
- Stud finder (optional, for wall mounting)
- Wire nuts and electrical tape (for hardwiring)
- Insulation or fire-rated foam (to seal gaps)
- Work gloves and safety glasses
If your insert requires hardwiring, you may also need a voltage tester and a wire stripper. For a plug-in model, a nearby outlet is essential. If no outlet exists, you may need to install one or use an extension cord rated for the appliance’s amperage. Always follow the manufacturer’s instructions for specific tools.
Step-by-Step Installation Guide
Follow these steps for a safe and successful installation. This guide assumes you are installing a plug-in or built-in electric insert into an existing fireplace opening.
Step 1: Prepare the Fireplace
Clear the area around the fireplace. Remove any gas logs, grates, or old inserts. If you have a gas line, turn off the gas supply and cap it professionally. Clean the cavity thoroughly, removing soot, ash, and debris. For wood-burning fireplaces, ensure the chimney is clean and the damper is closed and sealed with insulation to prevent cold air drafts. A fireplace inflatable draft stopper can be a temporary solution, but for a permanent seal, use fire-rated insulation.
Step 2: Plan the Power Supply
Determine how you will power the insert. If you are using a plug-in model, check that an outlet is within reach of the cord (usually 6 feet). If not, you may need to install a new outlet or use a heavy-duty extension cord. For hardwired models, turn off the power at the circuit breaker and run a dedicated line to the fireplace location. This is a task best left to a licensed electrician if you are not experienced with electrical work. Many inserts are energy efficient and can run on a standard 15-amp circuit, but always check the amperage requirements.
Step 3: Test Fit and Adjust
Before securing anything, slide the insert into the opening to check the fit. It should sit flush with the surround or slightly recessed. If there are gaps, you can use trim kits or filler panels. Some models come with adjustable feet or leveling legs. Use a level to ensure the unit is straight. If the insert is too small for the opening, you may need a surround kit to cover the gaps. For a perfect fit, consider a fireplace electric insert with blower that includes a trim kit.
Step 4: Secure the Insert
Once the fit is confirmed, secure the insert using the provided screws or brackets. For built-in models, you may need to attach it to the surrounding mantel or framing. If you are installing into a masonry fireplace, use masonry screws. For a finished look, attach the trim kit or surround. Make sure the unit is stable and cannot tip forward. If you are installing a 60-inch wall-mounted electric fireplace, follow the wall-mounting instructions instead, as they are designed for different installation methods.
Step 5: Connect Power and Test
For plug-in models, plug the cord into the outlet. For hardwired models, connect the wires according to the diagram (usually black to black, white to white, ground to green). Turn the power back on and test the unit. Check the flame effect, heater, and remote control. Ensure the heater blows warm air and that there are no unusual noises. If the unit does not turn on, check the circuit breaker and wiring. Many modern inserts have a reset button for safety; consult the manual if needed.
Step 6: Final Touches and Safety Checks
After testing, seal any gaps around the insert with insulation or caulk to prevent drafts. If you have a fireplace thermostat or remote, program it to your desired settings. Keep flammable materials away from the unit, and maintain a safe distance from furniture. Refer to furniture distance from fireplace guidelines. Finally, register your product and keep the manual for future reference.
Common Mistakes to Avoid
Even a simple installation can go wrong if you overlook key details. Here are the most common pitfalls:
- Ignoring the power requirements: Plugging a high-wattage insert into an overloaded circuit can trip breakers. Always check the amperage and use a dedicated circuit if possible. If you experience frequent tripping, read electric fireplace tripping breaker for solutions.
- Not sealing the chimney: An open damper lets cold air in and warm air out, making your home less efficient. Seal it properly to avoid cold air coming down your chimney.
- Poor fit: Gaps around the insert not only look bad but also allow heat to escape. Use a surround kit or trim to cover gaps.
- Skipping safety checks: Always test for overheating, unusual smells, or electrical issues. If the unit smells like gas, it is likely a new-unit smell, but if it persists, consult the manual or a professional.
By avoiding these mistakes, you can enjoy a safe and beautiful electric fireplace for years to come.
Cost and Time Expectations
The cost of installing an electric fireplace insert depends on whether you hire a professional or do it yourself. If you are handy, you can complete the project in a few hours. However, if you need electrical work or custom framing, it may take longer. The cost of the insert itself varies by tier: entry-level models are budget-friendly, mid-range models offer better flame realism, and premium or luxury models include advanced features like crackling sound and smart home integration. For a detailed breakdown of costs, see our guide on the cost of installing a fireplace insert. Labor costs for an electrician, if needed, are separate. Overall, an electric insert is one of the most affordable ways to upgrade a fireplace, especially compared to converting wood to gas or installing a new gas line.
Maintenance and Care After Installation
Electric inserts are low maintenance. Dust the exterior with a soft cloth, and clean the glass with a non-ammonia glass cleaner. Check the vents for dust buildup and vacuum them gently. Unlike wood or gas fireplaces, there is no chimney to clean or creosote to worry about. However, you should still perform an annual inspection of the cord and plug for damage. For more tips, see our guide on electric fireplace maintenance. If you notice any performance issues, such as the flame not working, refer to flame not working for troubleshooting steps.
Frequently Asked Questions
Can I install an electric insert myself?
Yes, most plug-in models are DIY-friendly. Hardwired models may require an electrician. Always follow local codes and the manufacturer’s instructions. See our DIY vs professional installation guide for more details.
Do I need a chimney for an electric insert?
No. Electric inserts do not require a chimney or venting. They are ideal for fireplaces without a chimney or for apartments.
How much heat does an electric insert produce?
Most models produce between 4,000 and 5,000 BTUs, enough to heat a small to medium room. For larger spaces, look for a best electric fireplace heater for large room.
Can I install an electric insert in a mobile home?
Yes, many are approved for manufactured homes. Check the product specifications for safety ratings.
What if my insert doesn’t fit?
You may need a surround kit or a different size. Measure carefully before purchasing. If you have an unusual opening, consider a custom installation.