
DIY Fireplace Frame: Complete Building Guide
Transform your fireplace with a custom-built frame that enhances your home's aesthetic and increases its value
GET STARTED
DIY Fireplace Frame Benefits: Building your own fireplace frame allows for complete customization, significant cost savings compared to pre-made options, and the satisfaction of creating a unique focal point for your home that perfectly matches your style.
A DIY fireplace frame serves as the architectural foundation for your fireplace surround, providing both aesthetic appeal and structural support. Whether you're working with a electric fireplace, gas fireplace, or even creating a faux fireplace, a well-constructed frame can transform an ordinary hearth into a stunning centerpiece for any room.
In this comprehensive guide, we'll walk you through everything you need to know about building a DIY fireplace frame, from planning and material selection to step-by-step construction techniques and finishing touches. By the end, you'll have all the knowledge needed to tackle this rewarding DIY fireplace project with confidence.
Why Build Your Own Fireplace Frame
Building a custom fireplace frame offers numerous advantages over purchasing a pre-made solution. Here are the key benefits that make this DIY project worthwhile:
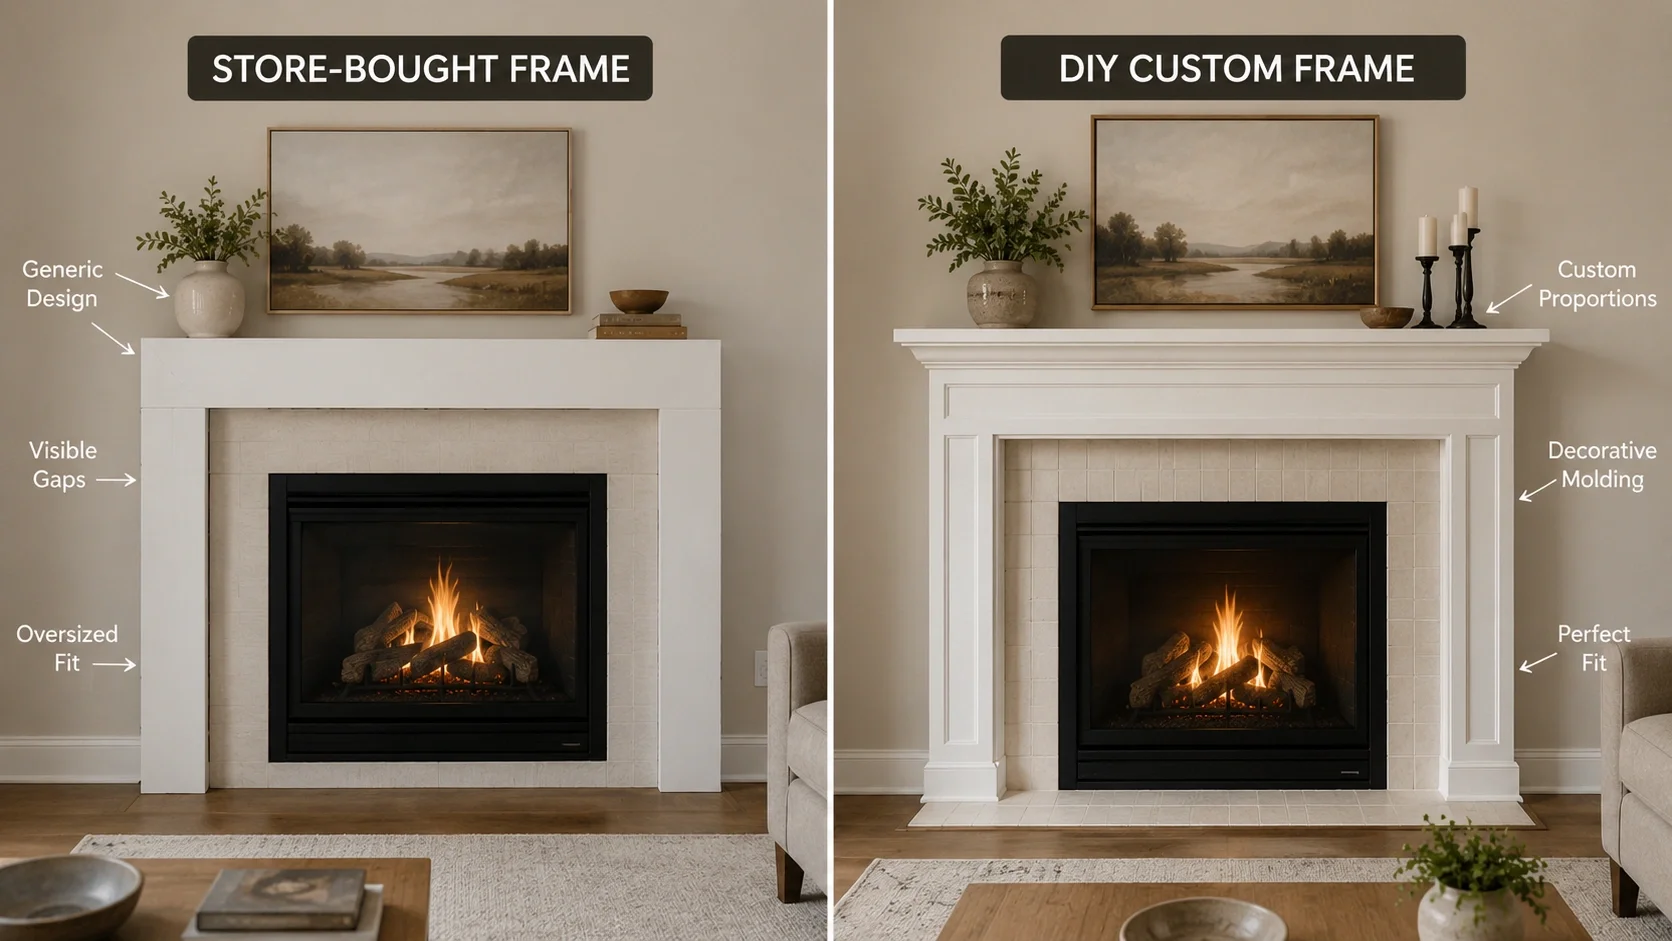
Custom DIY frames allow for precise fitting and personalized design elements
Cost Savings
Pre-made fireplace frames can cost anywhere from $500 to $3,000 or more, depending on materials and complexity. By building your own frame, you can typically complete the project for $150-$400 in materials, representing significant savings while still achieving a professional-looking result.
Customization
Every fireplace opening is slightly different in size and proportion. A DIY approach allows you to create a frame that perfectly fits your specific dimensions and architectural style. You can incorporate elements that match your home's existing woodwork, creating a cohesive design that would be difficult to find in commercial options.
Skill Development
Building a fireplace frame is an excellent intermediate woodworking project that helps develop valuable skills including precise measuring, miter cutting, assembly techniques, and finishing methods. These skills transfer to other home improvement projects, making this a practical learning experience.
Satisfaction and Pride
There's a unique sense of accomplishment that comes from building something with your own hands that becomes a focal point in your home. A DIY fireplace frame becomes a conversation piece and a source of pride for years to come.
Frame Styles and Design Options
Before beginning your DIY fireplace frame project, it's important to choose a style that complements your home's architecture and your personal taste. Here are some popular options to consider:

Traditional
Features ornate moldings, fluted pilasters, and classical proportions. Perfect for traditional fireplace designs and formal living spaces.
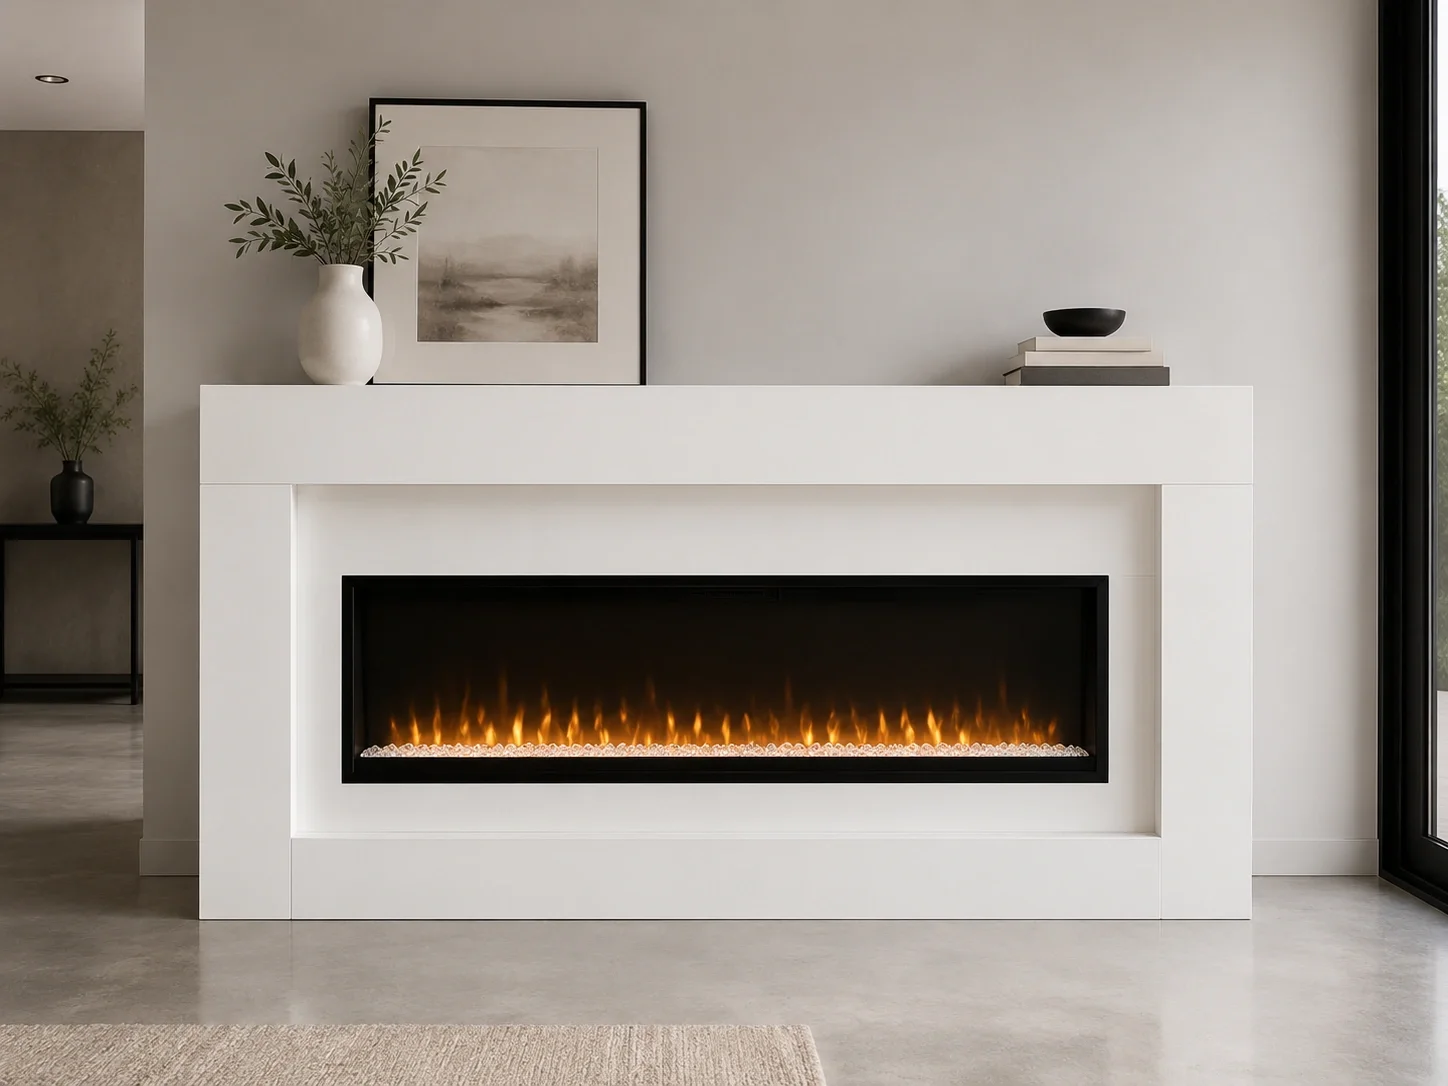
Modern
Characterized by clean lines, minimal ornamentation, and simple geometric shapes. Ideal for modern fireplace aesthetics and contemporary homes.
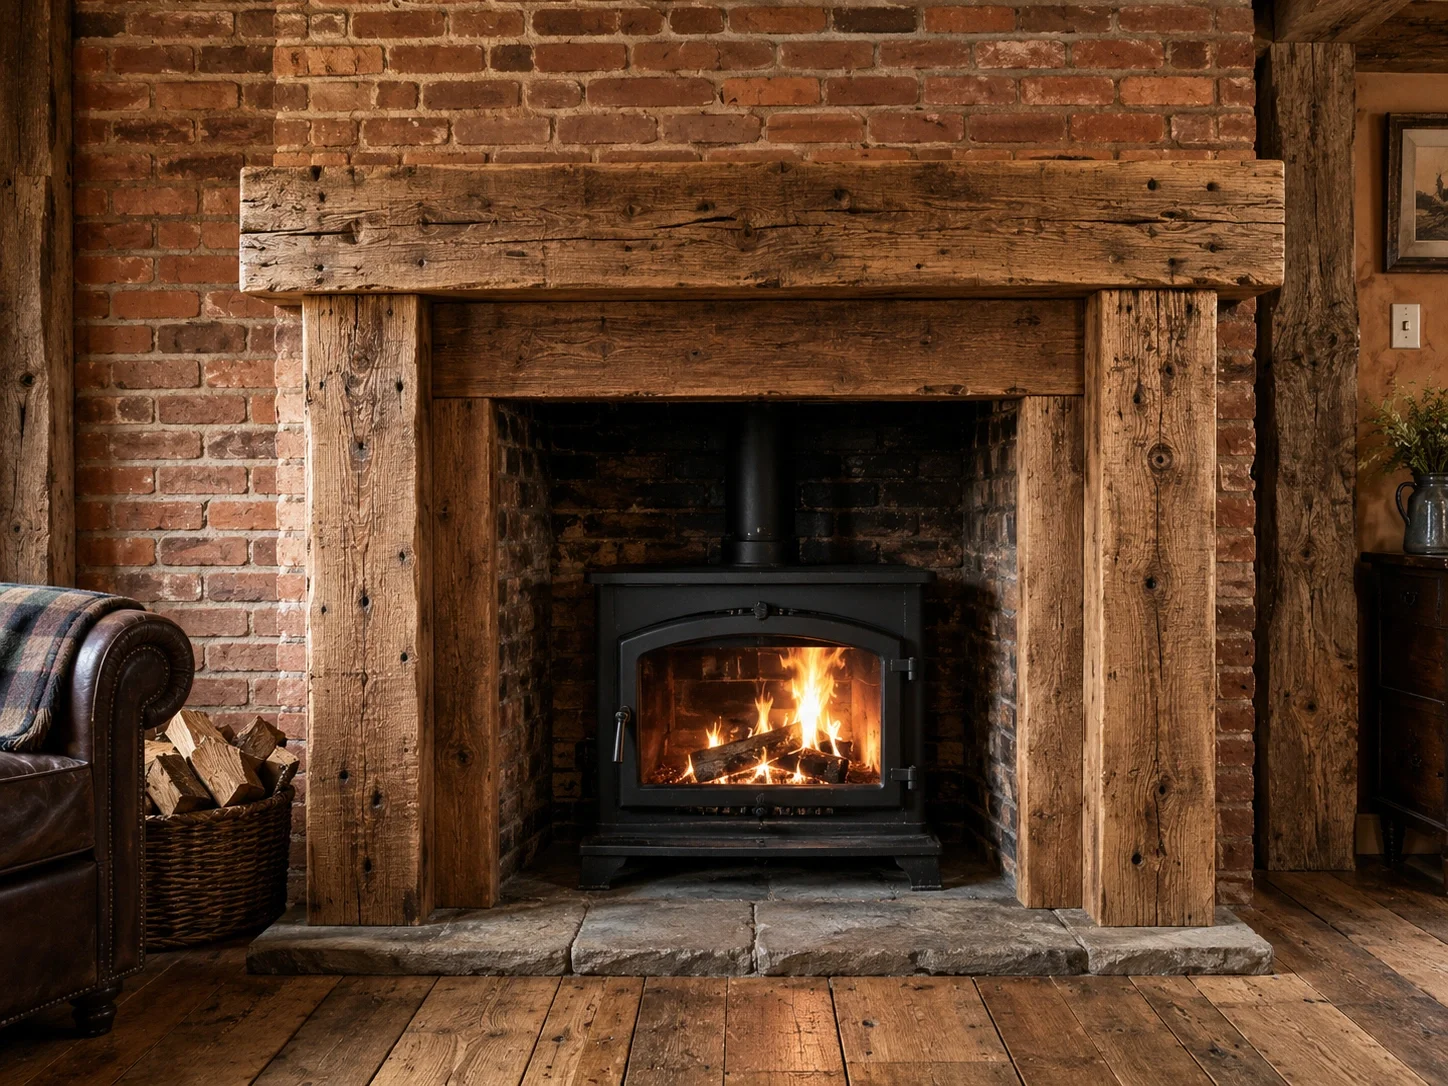
Rustic
Uses reclaimed wood, rough-hewn beams, and natural finishes. Perfect for rustic fireplace designs and cabins or country-style homes.

Farmhouse
Incorporates shiplap, vertical boards, and simple moldings. Works beautifully with shiplap fireplace designs and farmhouse-style interiors.
When selecting your style, consider the existing architectural elements in your home, the room's overall design theme, and how the fireplace will be used. For example, if you're planning to mount a TV above the fireplace, you might opt for a TV and fireplace wall design that incorporates the frame into a larger media wall.
Materials and Tools Needed
Selecting the right materials is crucial for a successful DIY fireplace frame project. The choice depends on your budget, skill level, and the desired finish. Here's what you'll need:
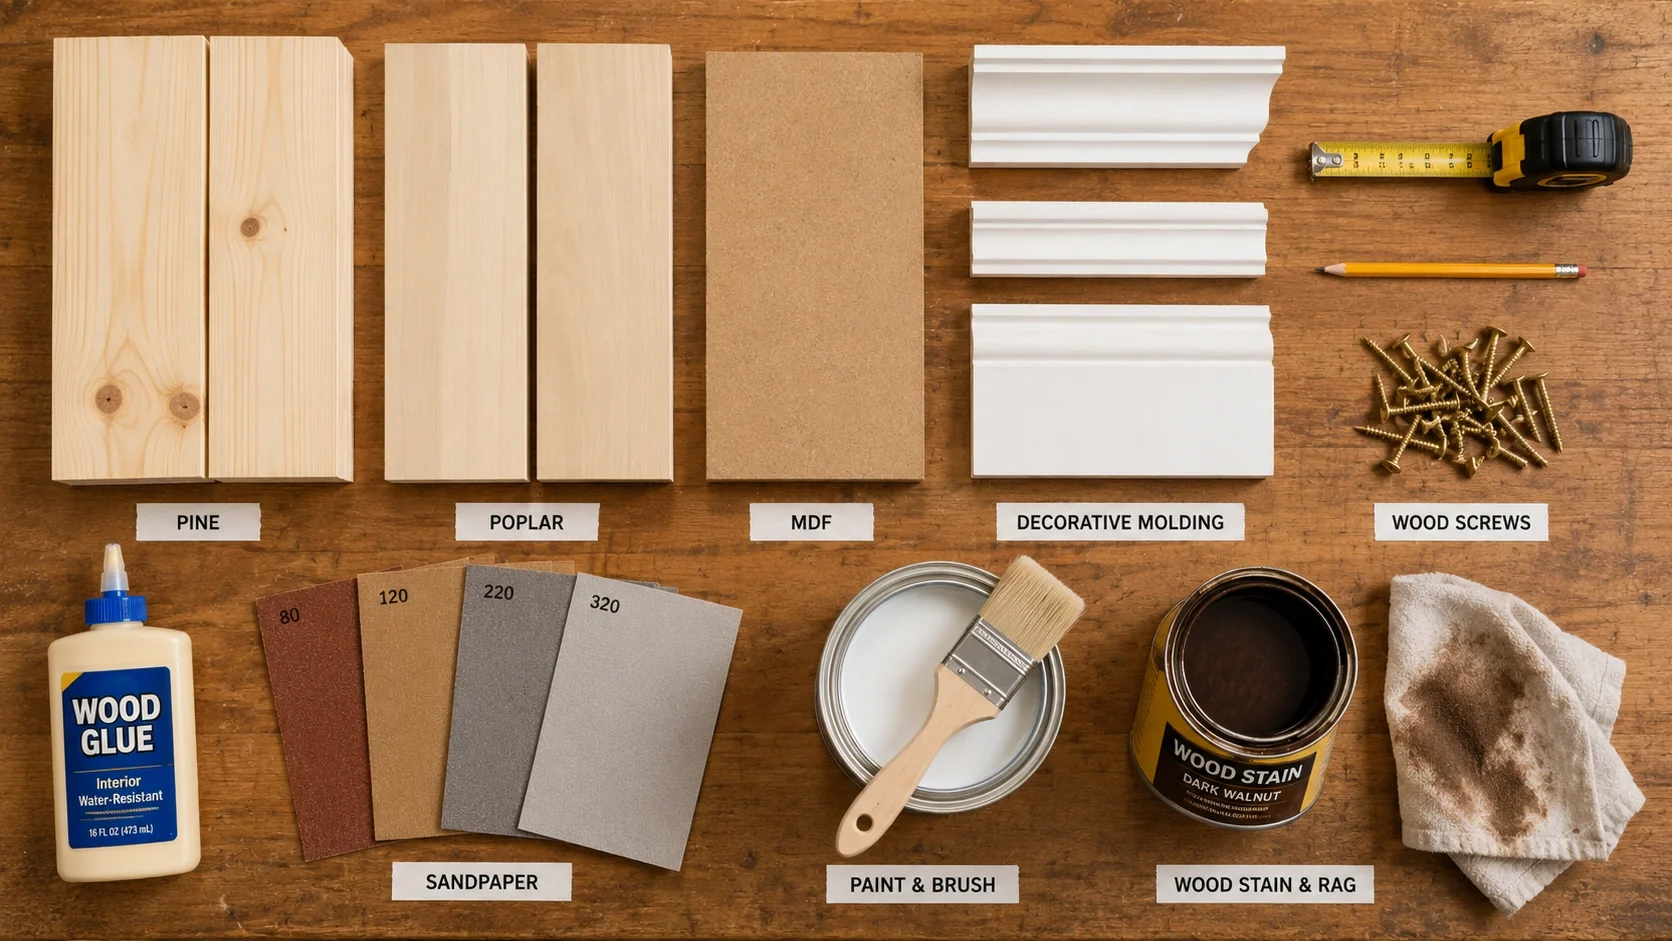
Essential materials for a DIY fireplace frame project
Wood Options
- Pine: Affordable and easy to work with, ideal for painted frames ($3-$5 per board foot)
- Poplar: Smooth, fine-grained wood that takes paint well ($4-$7 per board foot)
- Oak: Durable hardwood with attractive grain, suitable for stained finishes ($6-$10 per board foot)
- MDF (Medium Density Fiberboard): Budget-friendly option that provides a smooth, consistent surface ($25-$40 per 4x8 sheet)
- Reclaimed Wood: Offers character and sustainability, perfect for rustic designs ($5-$15 per board foot)
Additional Materials
- Decorative molding and trim ($3-$15 per linear foot)
- Wood screws (1.5" to 2.5" length)
- Wood glue
- Wood filler
- Sandpaper (various grits from 80 to 220)
- Primer and paint or wood stain and polyurethane
- Construction adhesive
- Metal brackets or cleats for wall mounting
Essential Tools
- Measuring tape and combination square
- Miter saw (for precise angle cuts)
- Table saw or circular saw (for ripping boards to width)
- Drill with various bits
- Nail gun (optional but speeds up assembly)
- Clamps (at least 4-6 bar clamps)
- Level (4-foot level recommended)
- Sander (random orbital or belt sander)
- Safety equipment (glasses, dust mask, ear protection)
💡 Material Selection Tips
- For painted frames, MDF or poplar offer the smoothest finish
- If you plan to stain the frame, choose a wood with attractive grain like oak or maple
- Consider using a combination of materials—for example, MDF for the main frame and solid wood for decorative elements
- Always inspect wood for warping, splitting, or other defects before purchase
- Buy 10-15% more material than calculated to account for mistakes and waste
Step-by-Step Construction Guide
Follow these detailed steps to build and install your DIY fireplace frame. We'll break down the process into manageable phases to ensure success.
Begin by carefully measuring your fireplace opening. Measure the width at the top, middle, and bottom, as well as the height on both sides, as openings are rarely perfectly square. Record the largest measurements to ensure your frame will fit.
Determine how far you want the frame to extend beyond the opening—typically 3-6 inches on each side and 6-12 inches above. Sketch your design on paper, noting all dimensions. For more complex designs, consider creating a cardboard template to test the proportions before cutting wood.
Cut your primary frame pieces to size using a miter saw. For a basic frame, you'll need two vertical pieces (pilasters) and one horizontal piece (header). Use 45-degree miter cuts at the corners for a professional look.
If you're adding decorative elements like moldings or panels, cut these pieces as well. Remember to label each piece with its location to avoid confusion during assembly.

Precise miter cuts are essential for tight corner joints
Begin assembly by dry-fitting the pieces to check for proper alignment. Apply wood glue to the mitered edges and join the pieces, using clamps to hold them together while the glue dries. Reinforce the joints with screws from the inside of the frame where they won't be visible.
For added strength, you can add small wooden blocks in the corners of the frame. Once the basic frame is assembled, attach any decorative moldings or additional elements using wood glue and small finish nails.
Thoroughly sand the entire frame, starting with a coarser grit (80-120) to remove any imperfections and smooth joints, then progressing to finer grits (150-220) for a smooth finish. Pay special attention to the mitered corners to ensure they're perfectly smooth.
Apply your chosen finish—whether paint, stain, or a combination. For painted frames, apply a coat of primer followed by two coats of quality paint, sanding lightly between coats. For stained frames, apply the stain, allow it to penetrate, wipe off excess, and finish with two or three coats of polyurethane for protection.

Proper finishing protects the frame and enhances its appearance
Position the finished frame around the fireplace opening, checking for level and plumb. Use shims if necessary to ensure perfect alignment. Secure the frame to the wall using construction adhesive and screws driven into wall studs where possible. For heavier frames or those with significant overhang, install metal brackets or cleats for additional support.
Fill any screw holes with wood filler, touch up the finish as needed, and add caulk around the edges where the frame meets the wall to create a clean, professional appearance.
⚠️ Installation Safety Tips
- Ensure the fireplace is completely cool before beginning installation
- Maintain proper clearance between the frame and the firebox according to manufacturer specifications
- Use appropriate fasteners for your wall type (drywall anchors, masonry anchors, etc.)
- If installing around a gas or wood-burning fireplace, verify compliance with local building codes
- Consider adding a fireplace hearth extension if your frame projects significantly from the wall
Cost Breakdown
Understanding the potential costs of your DIY fireplace frame project helps with budgeting and material selection. Here's a breakdown of typical expenses:
| Item | Budget Option | Mid-Range Option | Premium Option |
|---|---|---|---|
| Primary Frame Material | $40 (MDF) | $80 (Poplar) | $150 (Oak) |
| Decorative Molding | $20 | $50 | $100 |
| Hardware & Fasteners | $15 | $25 | $40 |
| Finish (Paint/Stain) | $25 | $45 | $75 |
| Tools (if purchasing) | $100 | $250 | $500 |
| Total (excluding tools) | $100 | $200 | $365 |
These estimates assume a standard-sized frame for a typical fireplace opening. Larger or more elaborate designs will increase material costs. If you already own basic tools, your out-of-pocket expense will be significantly lower.
Compared to purchasing a pre-made frame ($500-$3,000+) or hiring a professional carpenter ($1,000-$5,000+ including labor), building your own frame represents substantial savings while allowing for complete customization to match your fireplace ideas.
Common Mistakes to Avoid
Learning from others' experiences can help ensure your DIY fireplace frame project goes smoothly. Here are common pitfalls and how to avoid them:
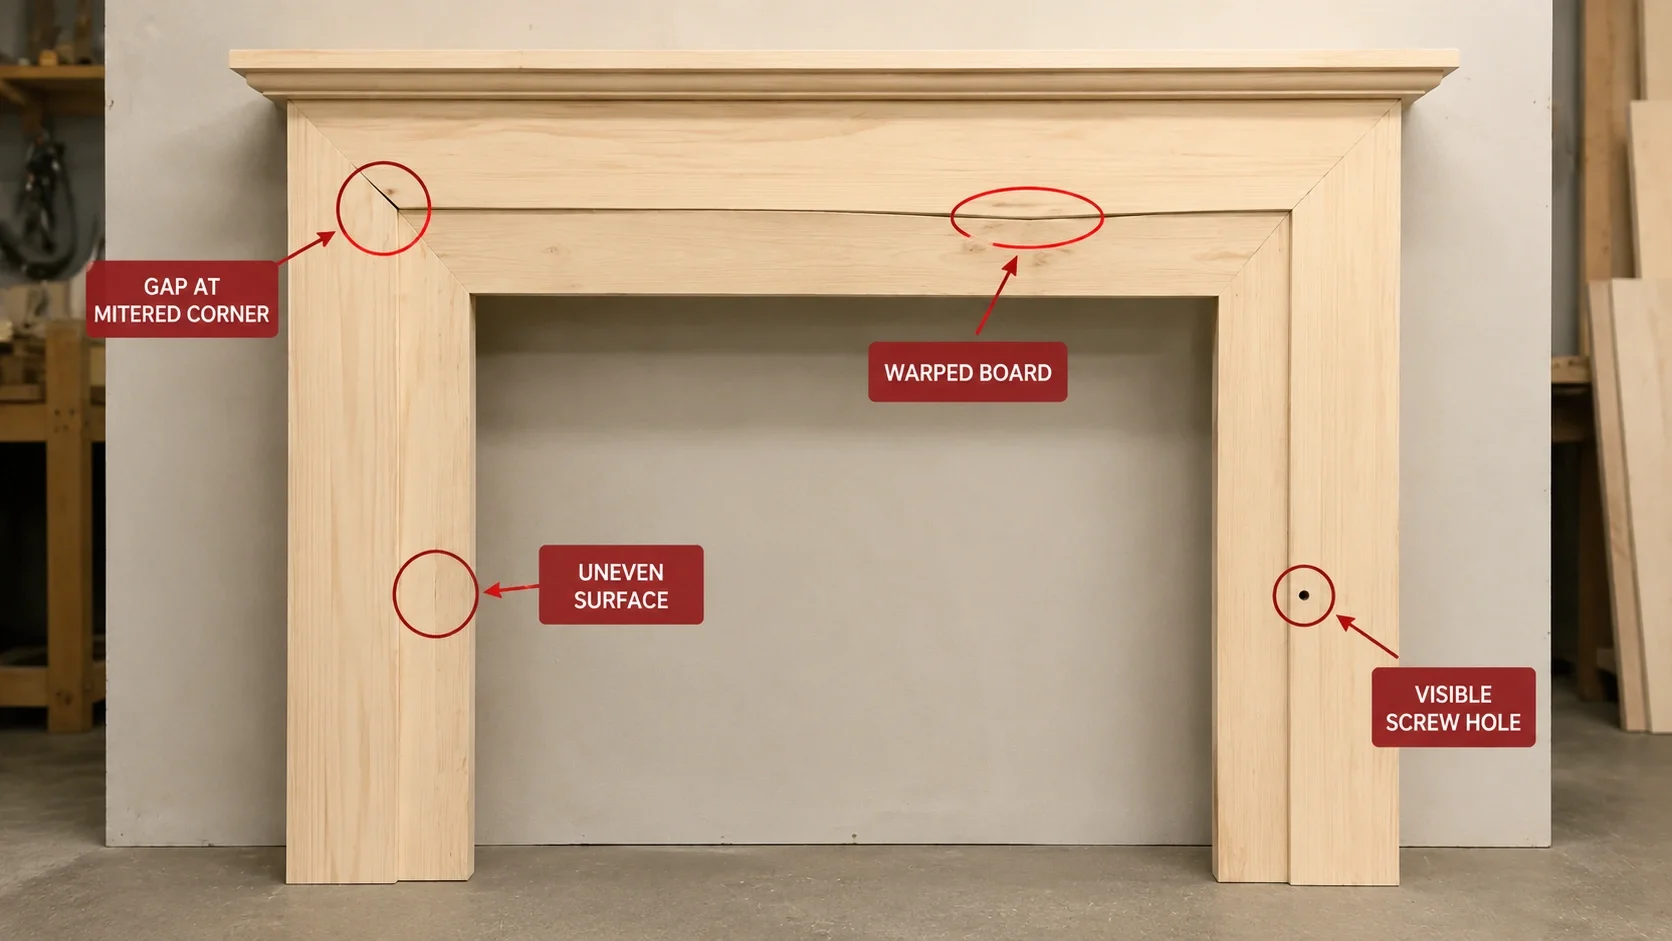
Avoiding these common mistakes will save time and frustration
Inaccurate Measurements
The most common mistake is failing to measure accurately. Remember that fireplace openings are rarely perfectly square—always measure at multiple points and use the largest measurements. It's better to have to trim slightly than to discover your frame is too small.
Poor Miter Cuts
Gaps at mitered corners are a telltale sign of amateur work. Take time to set up your miter saw correctly, make test cuts on scrap wood, and consider using a miter jig for added precision. When cutting, cut slightly long and trim to fit for the perfect joint.
Insufficient Clamping
Proper clamping is essential for strong, gap-free joints. Invest in enough clamps to hold all joints simultaneously while glue dries. Use clamp blocks to prevent marring the wood surface, and apply even pressure without over-tightening.
Rushing the Finish
The finish is what people will see, so don't rush this step. Proper sanding with progressively finer grits creates the foundation for a professional-looking finish. Allow adequate drying time between coats, and resist the temptation to apply thick coats of paint or stain, which can lead to drips and uneven coverage.
Ignoring Safety Clearances
For frames around functioning fireplaces, maintaining proper clearances is critical for safety. Consult the fireplace manufacturer's specifications and local building codes to ensure your frame is installed at a safe distance from the firebox. This is especially important for gas fireplaces and wood-burning fireplaces.
Enhancements and Variations
Once you've mastered the basic frame construction, consider these enhancements to create a truly unique fireplace feature:

Built-in shelves transform a simple frame into a functional feature
Integrated Shelving
Incorporate shelves into your frame design to create a complete media wall or display area. This works particularly well for TV and fireplace wall designs, providing a cohesive look that maximizes storage and display space.
Lighting Elements
Add recessed lighting to the top of your frame to highlight the fireplace area and create ambiance. LED strip lights can be installed in a channel routed into the frame for a modern, sophisticated look.
Mixed Materials
Combine wood with other materials like tile, stone, or metal for added visual interest. For example, a wooden frame with a tiled fireplace surround inset creates a beautiful contrast of textures.
Architectural Details
Incorporate architectural elements like fluted columns, corbels, or pediments for a more formal, classical look. These details can be created using a router with appropriate bits or purchased as pre-made decorative elements.
Hidden Storage
Design your frame with hidden compartments for storing fireplace tools, remote controls, or media equipment. This is especially useful for electric fireplaces where the firebox doesn't extend deep into the wall.
Maintenance and Care
Proper maintenance will keep your DIY fireplace frame looking great for years to come. Here's how to care for your creation:
Regular Cleaning
Dust your frame regularly with a soft cloth or duster. For painted frames, occasional wiping with a damp cloth is usually sufficient. For stained or natural wood frames, use a wood cleaner appropriate for the finish type, following up with furniture polish or wax as needed.
Touch-ups
Keep some leftover paint or stain for touch-ups as needed. Minor scratches or dings can be easily repaired with a small brush and matching finish. For deeper damage, lightly sand the area before applying touch-up material.
Seasonal Inspection
Include your fireplace frame in your seasonal fireplace maintenance checklist. Check for any loose joints, signs of warping, or heat damage. Address any issues promptly to prevent further deterioration.
Heat Protection
For frames around functioning fireplaces, ensure adequate clearance and consider adding a heat shield if necessary. Monitor for any signs of heat damage such as discoloration, cracking, or warping, which could indicate the frame is too close to the heat source.
Frequently Asked Questions
How long does it take to build a DIY fireplace frame?
For a basic frame, plan on 6-8 hours of actual work time, plus drying time for glue and finish. More elaborate designs with decorative elements may take 12-20 hours. It's best to spread the project over a weekend to allow adequate drying time between steps.
Can I build a frame for any type of fireplace?
Yes, but the approach may vary. For electric fireplaces, the frame is primarily decorative. For gas fireplaces and wood-burning fireplaces, you must maintain proper clearances and use heat-resistant materials where appropriate. Always check manufacturer specifications and local building codes.
Do I need advanced woodworking skills?
A basic frame project is suitable for intermediate DIYers with some woodworking experience. You should be comfortable with measuring, cutting, and basic joinery. Starting with a simple design and progressing to more complex projects as your skills improve is a good approach.
What's the most durable wood for a fireplace frame?
For maximum durability, especially around heat sources, hardwoods like oak, maple, or mahogany are excellent choices. They resist warping and damage better than softwoods. However, for painted frames where the wood grain isn't visible, MDF can actually be more dimensionally stable than solid wood.
Can I install a frame over an existing surround?
In many cases, yes. If your existing surround is in good condition and properly secured, you can build a new frame over it. This is a great option for updating the look without the work of removing the old surround. Ensure the new frame is properly secured to the wall, not just attached to the old surround.


