Complete Chimney Cleaning Guide
Essential steps, tools, and techniques to safely clean your chimney, prevent creosote buildup, and maintain optimal fireplace performance
EXPLORE TOOLSWhy Chimney Cleaning Is Essential for Fireplace Safety

Regular chimney cleaning is a critical aspect of fireplace maintenance that directly impacts your home's safety and your fireplace's efficiency. When wood burns, it produces byproducts including smoke, water vapor, gases, and unburned wood particles. As these substances rise and cool in the chimney, they condense on the interior walls, forming a dark, tar-like substance called creosote.
Creosote is highly flammable and is the leading cause of chimney fires in residential homes. According to the Chimney Safety Institute of America, creosote buildup is responsible for thousands of house fires annually, resulting in property damage, injuries, and even fatalities. Understanding how to properly clean your chimney can significantly reduce these risks.
⚠️ Safety Warning: Creosote in all forms is highly combustible. If it builds up in sufficient quantities and the internal flue temperature is high enough, it can catch fire. A chimney fire can reach temperatures of over 2,000°F, which can damage the chimney structure and potentially spread to the rest of your home.
Beyond safety concerns, a clean chimney ensures proper draft, which improves the efficiency of your wood-burning fireplace. When creosote accumulates, it narrows the flue passage, restricting airflow and causing smoke to back up into your living space. This not only creates unpleasant conditions but also introduces harmful pollutants into your home.
When to Clean Your Chimney: Frequency and Warning Signs

The frequency of chimney cleaning depends on several factors, including how often you use your fireplace, the type of wood you burn, and your burning practices. As a general rule, the National Fire Protection Association (NFPA) recommends that chimneys, fireplaces, and vents be inspected at least once a year and cleaned as needed.
Recommended Cleaning Schedule
- Light Use (1-2 times per week): Clean annually
- Moderate Use (3-4 times per week): Clean every 6 months
- Heavy Use (daily during heating season): Clean every 3-4 months
- After Any Chimney Fire: Clean immediately, even if it was a small fire
Signs Your Chimney Needs Cleaning
Don't wait for your scheduled cleaning if you notice any of these warning signs:
- Reduced Draft: Smoke backing up into your room indicates restricted airflow
- Strong Odor: A strong, acrid smell coming from your fireplace, especially in summer when humidity is high
- Visible Creosote: Black, shiny deposits visible when looking up the chimney with a flashlight
- Damaged Chimney Cap: Missing or damaged chimney cap can allow debris and animals to enter, increasing buildup
- Soot Falling: Black particles falling into the firebox when the fireplace isn't in use
- Difficulty Starting Fires: Struggling to get a fire going or keep it burning may indicate poor draft due to creosote
For a comprehensive approach to maintenance, refer to our seasonal fireplace checklist which includes chimney cleaning as part of your regular maintenance schedule.
Essential Chimney Cleaning Tools and Equipment
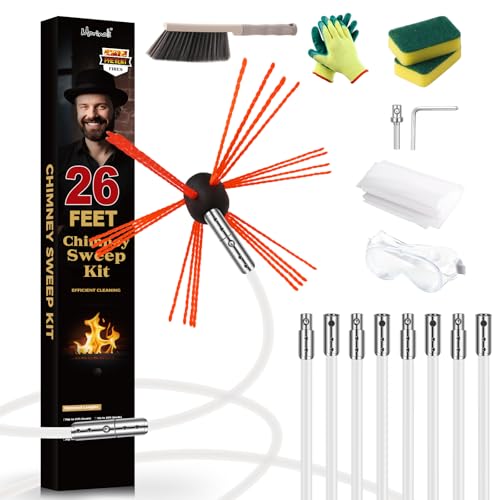
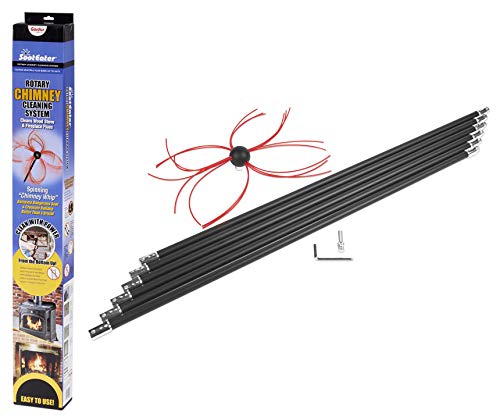
Having the right tools is crucial for effective chimney cleaning. While professionals use specialized equipment, homeowners can achieve good results with basic chimney cleaning supplies. Here are the essential tools you'll need:
Chimney Brush
A stiff-bristled brush sized to match your chimney's dimensions. Wire bristles work best for heavy creosote, while poly bristles are suitable for metal flues.
Flexible Rods
Fiberglass or poly rods that connect to extend the brush through the entire chimney length. Typically sold in sets of 3-5 feet sections.
Drop Cloth/Tarps
Large plastic or canvas coverings to protect your flooring and furniture from soot and debris during cleaning.
High-Quality Flashlight
A bright, waterproof flashlight to inspect the chimney interior before and after cleaning.
Chimney Brush Extension
Additional extensions if your chimney is particularly tall or has bends that require extra reach.
Protective Gear
Safety goggles, dust mask (N95 or better), and work gloves to protect yourself from soot and debris.
Shop Vacuum
A heavy-duty vacuum with HEPA filter for cleaning up soot and debris from the firebox and surrounding area.
Chimney Cover
💡 Pro Tip: Before purchasing tools, measure your chimney's dimensions carefully. A brush that's too small won't clean effectively, while one that's too large may get stuck. If you're unsure about sizing, consider hiring a professional for your first cleaning to observe the proper technique and tool requirements for your specific chimney.
For more information on fireplace accessories that can help with maintenance, check out our comprehensive guide to fireplace accessories.
Step-by-Step Guide to Cleaning Your Chimney
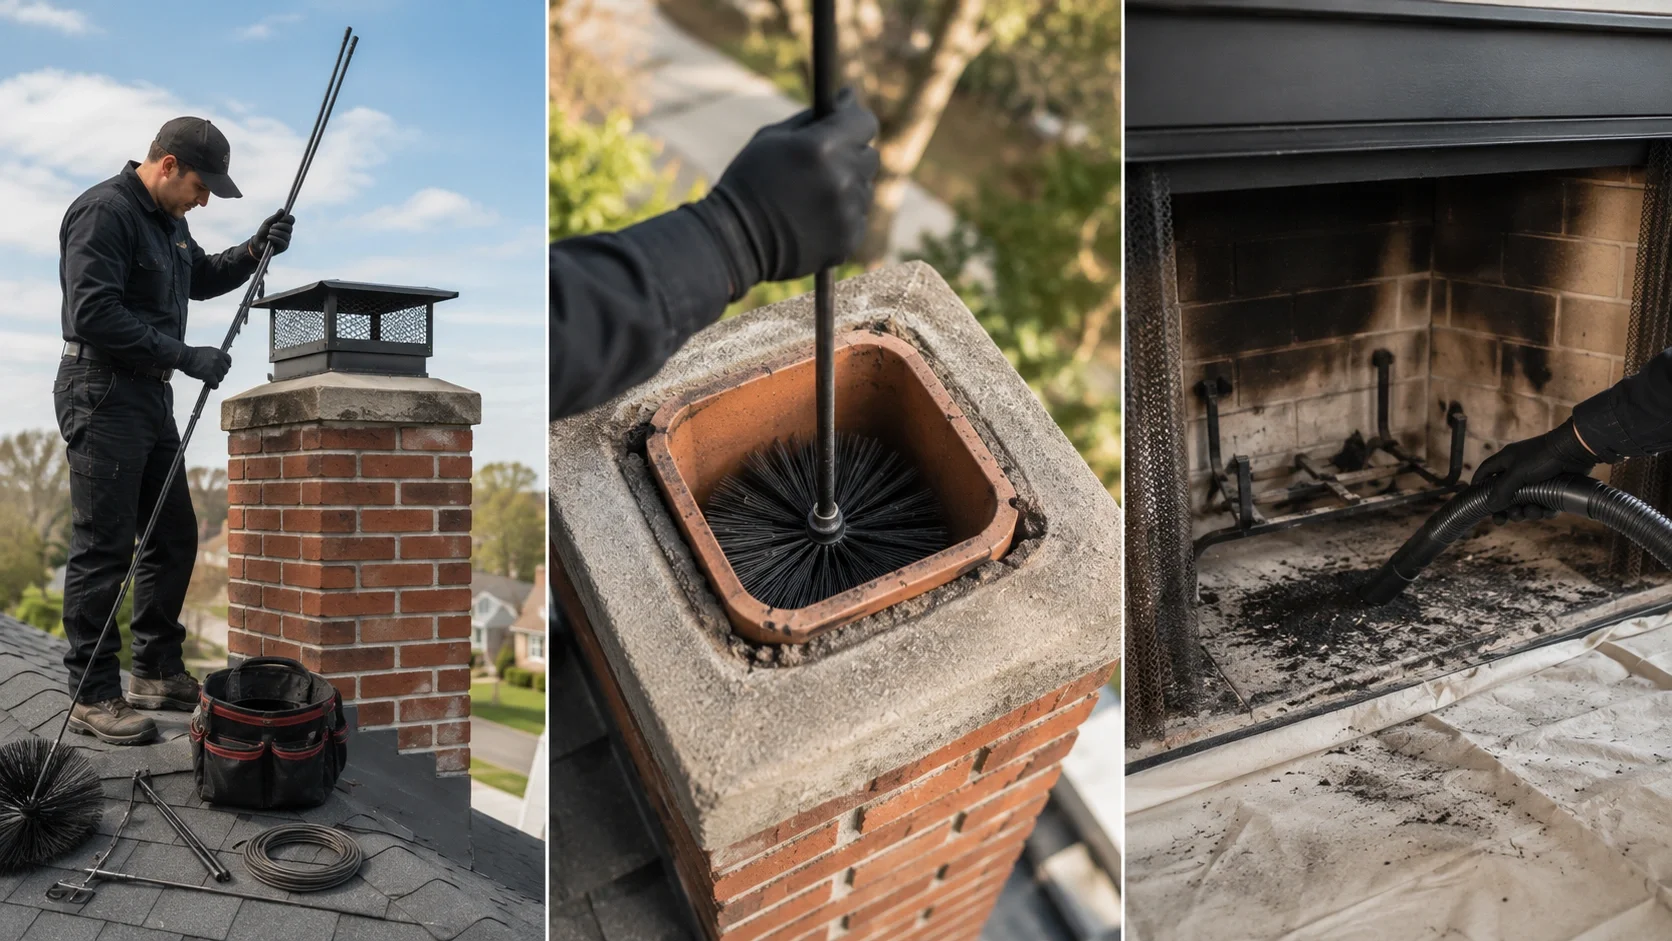
Now that you have your tools ready, follow these detailed steps to clean your chimney safely and effectively. This method works for most standard masonry chimneys with wood-burning fireplaces.
Prepare the Work Area
Remove all items from around the fireplace and cover the floor with drop cloths or plastic sheeting. Place additional protection over nearby furniture. Open the damper fully to allow debris to fall into the firebox. Wear your protective gear—goggles, mask, and gloves—before beginning.
Inspect the Chimney
Using your flashlight, inspect the chimney interior to assess creosote buildup level. This helps you determine how thorough your cleaning needs to be and identifies any potential issues like cracks, loose bricks, or animal nests that might require professional attention. For more detailed inspection techniques, see our DIY fireplace inspection checklist.
Set Up the Brush and Rods
Assemble the chimney brush with one or two rod sections, depending on your chimney's height. If cleaning from the top down (recommended), you'll need to access your roof safely. If cleaning from the bottom up, ensure you have enough rod sections to reach the top of the chimney.
Begin Cleaning (Top-Down Method)
Insert the brush into the chimney from the top and push it down while rotating it back and forth. This scrubbing motion dislodges the creosote from the chimney walls. Continue pushing down until you reach the smoke shelf, then pull back up slightly before pushing down again. Add more rod sections as needed to reach the entire length of the chimney.
Work Systematically
Work in sections, focusing on thoroughly cleaning each area before moving to the next. Pay special attention to areas where creosote tends to accumulate heavily, such as bends, offsets, and the smoke shelf. If you encounter particularly stubborn creosote, you may need to apply a creosote remover chemical before attempting to scrub again.
Clean the Firebox
Once you've cleaned the chimney flue, turn your attention to the firebox. Use your brush to scrub the walls and floor of the firebox, then vacuum up all the debris that has fallen from the chimney. Remove and clean the grate, andirons, and any other removable components.
Clean the Damper
Open and close the damper while brushing it to remove creosote buildup. Check that it moves freely and seats properly when closed. If the damper is difficult to operate, refer to our guide on fixing a stuck fireplace damper.
Final Inspection and Cleanup
Use your flashlight to inspect the chimney one more time, ensuring you've removed as much creosote as possible. Vacuum up all debris from the firebox and surrounding area. Dispose of the creosote and soot properly—it should not be added to compost piles or gardens due to its chemical content.
⚠️ Safety Precaution: If you encounter any of the following issues during cleaning, stop immediately and contact a professional: cracks in the chimney liner, loose or missing mortar joints, significant structural damage, or excessive creosote that cannot be removed with normal brushing. These issues require professional assessment and repair to ensure safe operation.
Understanding Creosote: Types and Removal Challenges

Not all creosote is created equal. Understanding the different types can help you assess the difficulty of your cleaning job and determine when professional help is necessary. Creosote typically forms in three stages:
Stage 1: Light, Flaky Creosote
This initial stage appears as a fine, black powder or flaky deposits that can be easily removed with a standard chimney brush. Stage 1 creosote poses the least risk and is simplest to clean, but it can quickly progress to more dangerous forms if not addressed promptly.
Stage 2: Crunchy, Granular Creosote
As creosote accumulates and undergoes chemical changes, it becomes darker, thicker, and takes on a crunchy or granular texture similar to black cornflake candy. This type requires more vigorous brushing and may need chemical treatments to fully remove. Stage 2 creosote is significantly more flammable than Stage 1.
Stage 3: Glazed, Tar-Like Creosote
The most dangerous form of creosote appears as a shiny, hard, tar-like coating that's extremely difficult to remove. It's highly concentrated and can fuel extremely hot chimney fires that can damage the chimney structure and spread to the house. Stage 3 creosote typically requires chemical creosote removers and often professional intervention to eliminate safely.
For detailed information on preventing creosote buildup, see our guide on creosote buildup prevention. Regular cleaning and proper burning practices are your best defense against dangerous creosote accumulation.
Preventing Creosote Buildup: Best Burning Practices
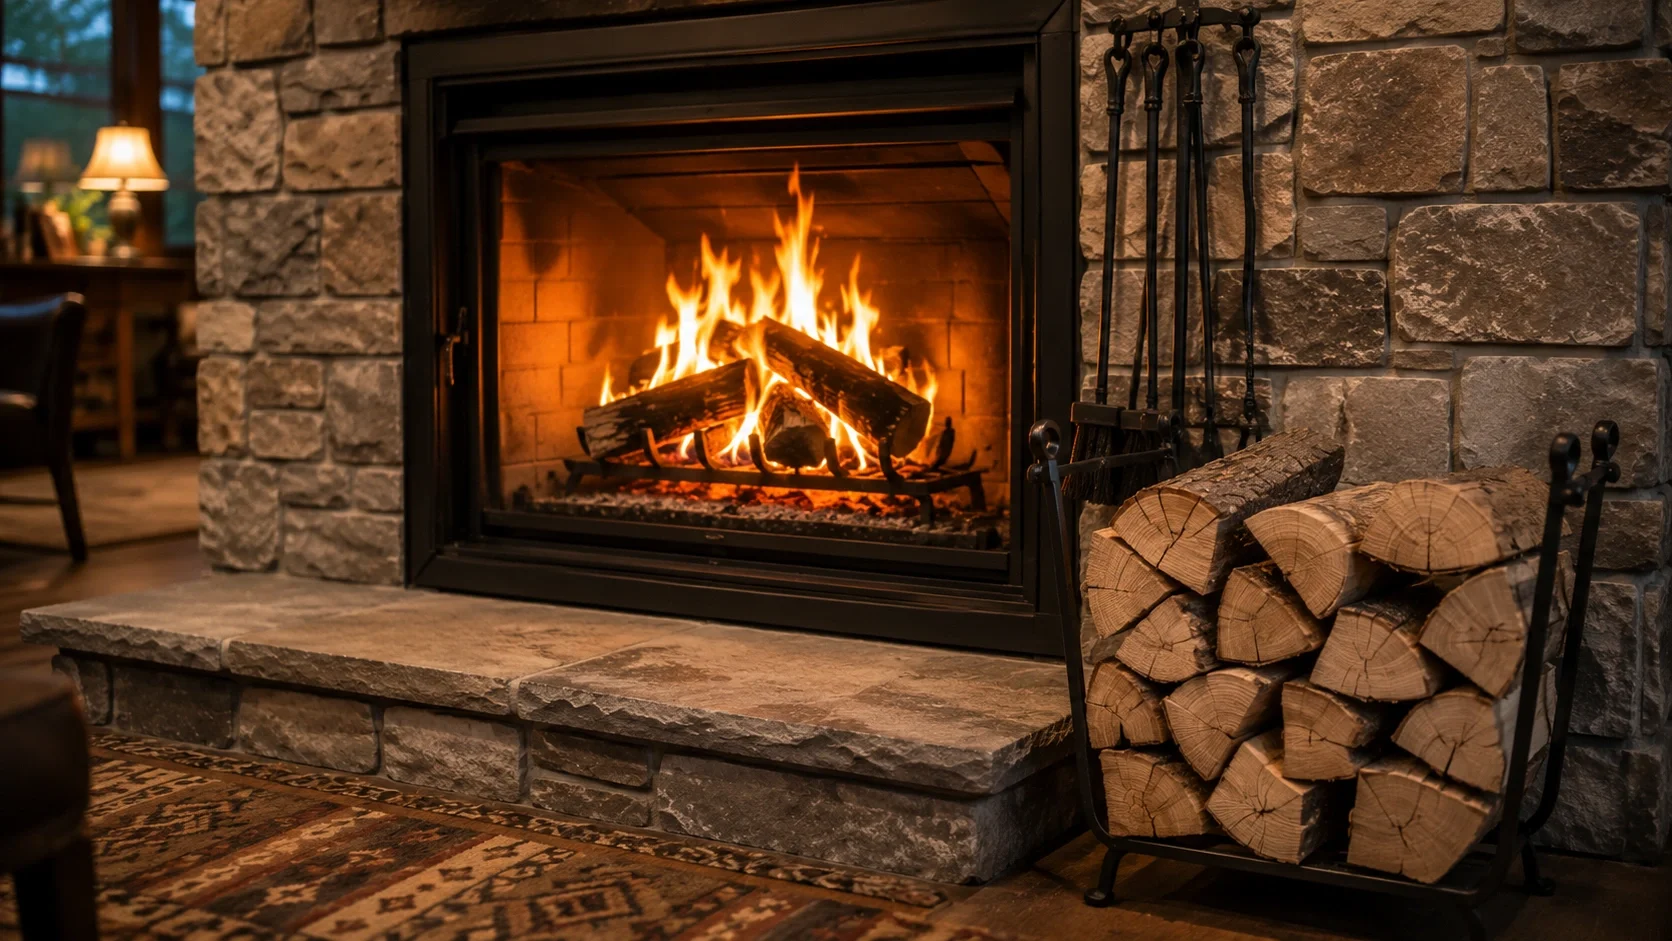
The most effective way to reduce chimney cleaning frequency is to minimize creosote formation through proper burning practices. These techniques not only reduce maintenance needs but also improve heating efficiency and reduce environmental impact:
- Burn Only Seasoned Wood: Wood should be dried for at least 6-12 months to reduce moisture content below 20%. Wet wood burns cooler and produces more smoke, which leads to faster creosote formation.
- Maintain Proper Airflow: Ensure your fireplace has adequate air supply by keeping the damper fully open during burning and considering ventilation requirements for your specific setup.
- Build Hotter Fires: Burn fires hot enough to ensure complete combustion. Smoldering, low-temperature fires produce more unburned particles that contribute to creosote formation.
- Avoid Restricting Airflow: Don't overload the fireplace with wood, which can restrict oxygen and create cooler, smoldering fires that produce more creosote.
- Use Proper Firebuilding Techniques: Start with small kindling and gradually add larger pieces. This creates a hotter fire faster, reducing the initial smoldering period that produces excess creosote.
- Consider a Chimney Cap: A properly installed chimney cap prevents rain from entering the chimney, which can cool the flue and accelerate creosote formation.
💡 Energy-Saving Tip: Proper burning practices not only reduce creosote but also improve heating efficiency by up to 30%. For more ways to maximize your fireplace's performance while minimizing energy waste, check out our fireplace energy saving tips.
DIY vs. Professional Chimney Cleaning: Making the Right Choice

While many homeowners can successfully clean their own chimneys, there are situations where hiring a professional is the safer and more effective choice. Here's how to determine which approach is best for your situation:
When DIY Cleaning Is Appropriate
- Your chimney is in good structural condition with no visible damage
- Creosote buildup is limited to Stage 1 or early Stage 2
- You have the proper tools and equipment for your chimney type
- You're comfortable working on ladders and at heights (for top-down cleaning)
- Your chimney is relatively straight without complex offsets or unusual configurations
- You're cleaning as part of regular maintenance, not addressing a specific problem
When to Hire a Professional
- You discover Stage 3 (glazed) creosote that doesn't respond to normal brushing
- You notice structural issues like cracks, loose bricks, or deteriorating mortar
- Your chimney has unusual configurations, multiple bends, or is particularly tall
- You've had a chimney fire, even a small one
- You're uncomfortable working at heights or lack proper safety equipment
- You're preparing to sell your home and need documentation of proper maintenance
- You haven't had a professional inspection in several years
Professional chimney sweeps typically charge $150–$500 for a standard cleaning, with prices varying based on chimney height, accessibility, and condition. While this represents an additional cost, professional services include a thorough inspection that can identify potential problems before they become dangerous or expensive to repair.
For guidance on when to schedule professional services, see our article on when to call a chimney sweep. For a comprehensive look at professional vs. DIY approaches to various fireplace tasks, check out DIY vs. professional fireplace installation.
Chimney Cleaning for Different Fireplace Types
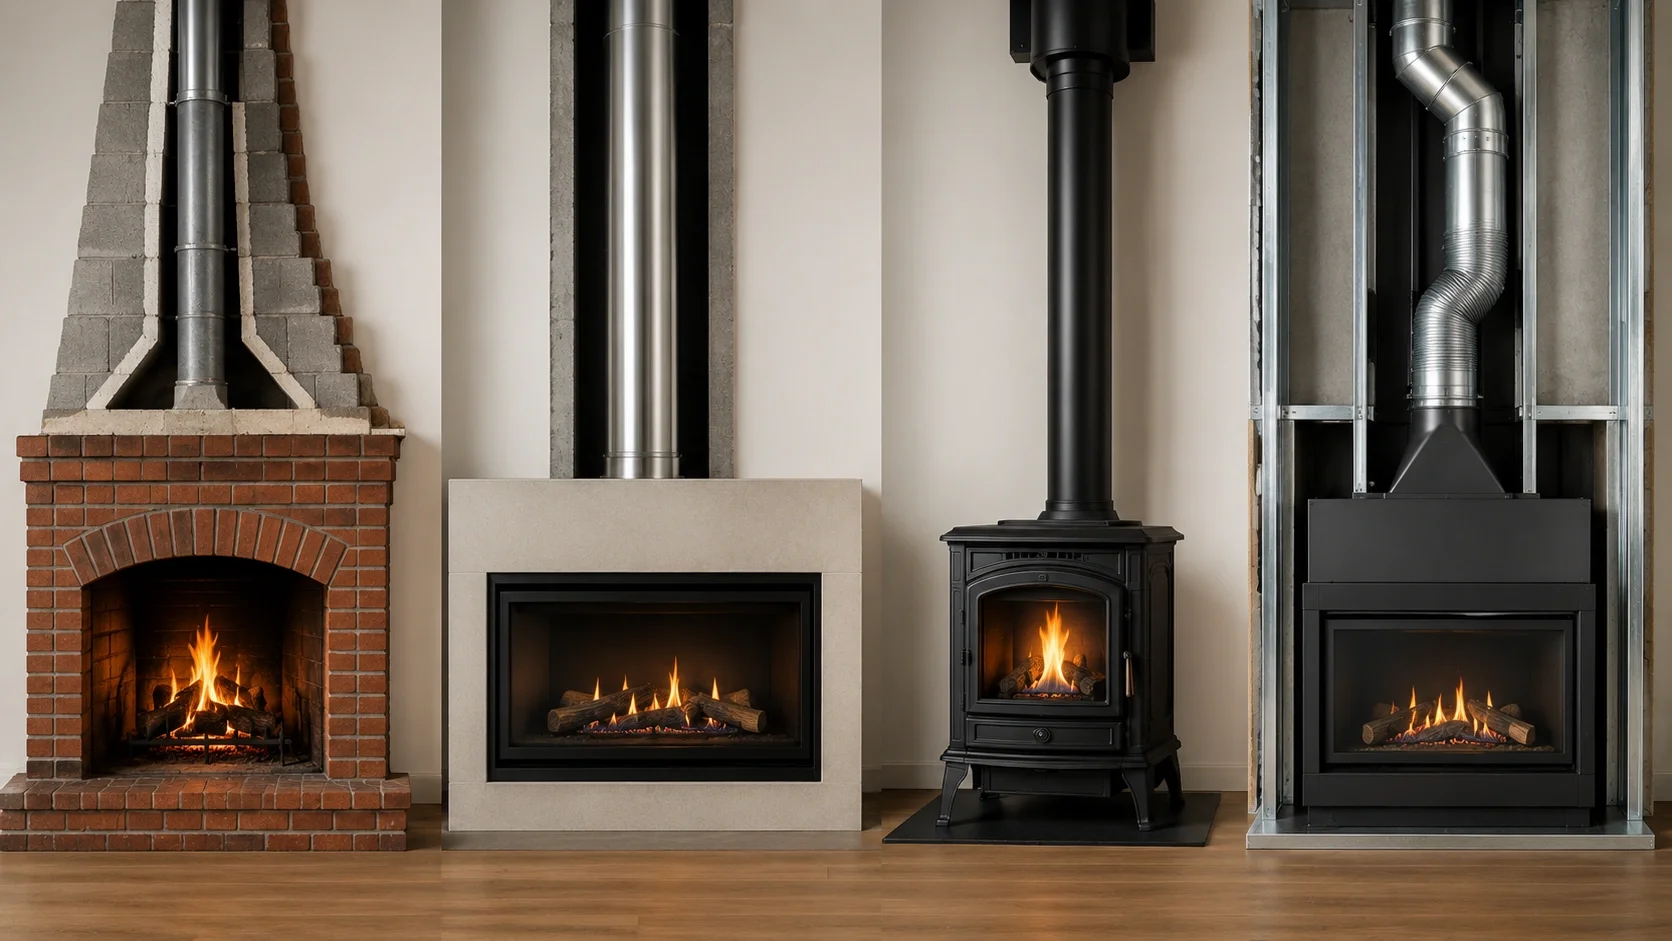
Not all chimneys are created equal, and cleaning techniques should be adapted based on your fireplace type. Here are specific considerations for different fireplace systems:
Wood-Burning Fireplaces
Traditional masonry chimneys for wood-burning fireplaces require the most frequent cleaning due to the higher creosote production. Follow the standard cleaning process outlined above, paying special attention to the smoke shelf and damper area where creosote tends to accumulate heavily.
Gas Fireplaces
While gas fireplaces produce minimal creosote, they still require chimney inspection and occasional cleaning to remove debris, check for obstructions, and ensure proper venting. The cleaning process is typically less intensive but should still be performed annually. For gas-specific maintenance, see our gas fireplace maintenance guide.
Pellet Stoves
Pellet stoves produce a different type of ash and may have more complex venting systems that include horizontal runs and multiple elbows. These systems often require specialized brushes and cleaning techniques. Consult your manufacturer's guidelines for specific cleaning instructions.
Factory-Built Fireplaces
Pre-fabricated fireplaces with metal chimney systems require gentler cleaning techniques to avoid damaging the liner. Use only brushes specifically designed for metal flues, and be extra cautious not to scratch or dent the liner during cleaning.
Outdoor Fireplaces
Outdoor fireplaces may have different cleaning requirements based on their exposure to weather elements. While they may not accumulate creosote as quickly, they can collect debris, leaves, and animal nests that require removal. For more information on maintaining outdoor units, see our outdoor fireplace maintenance tips.
Common Chimney Cleaning Mistakes to Avoid
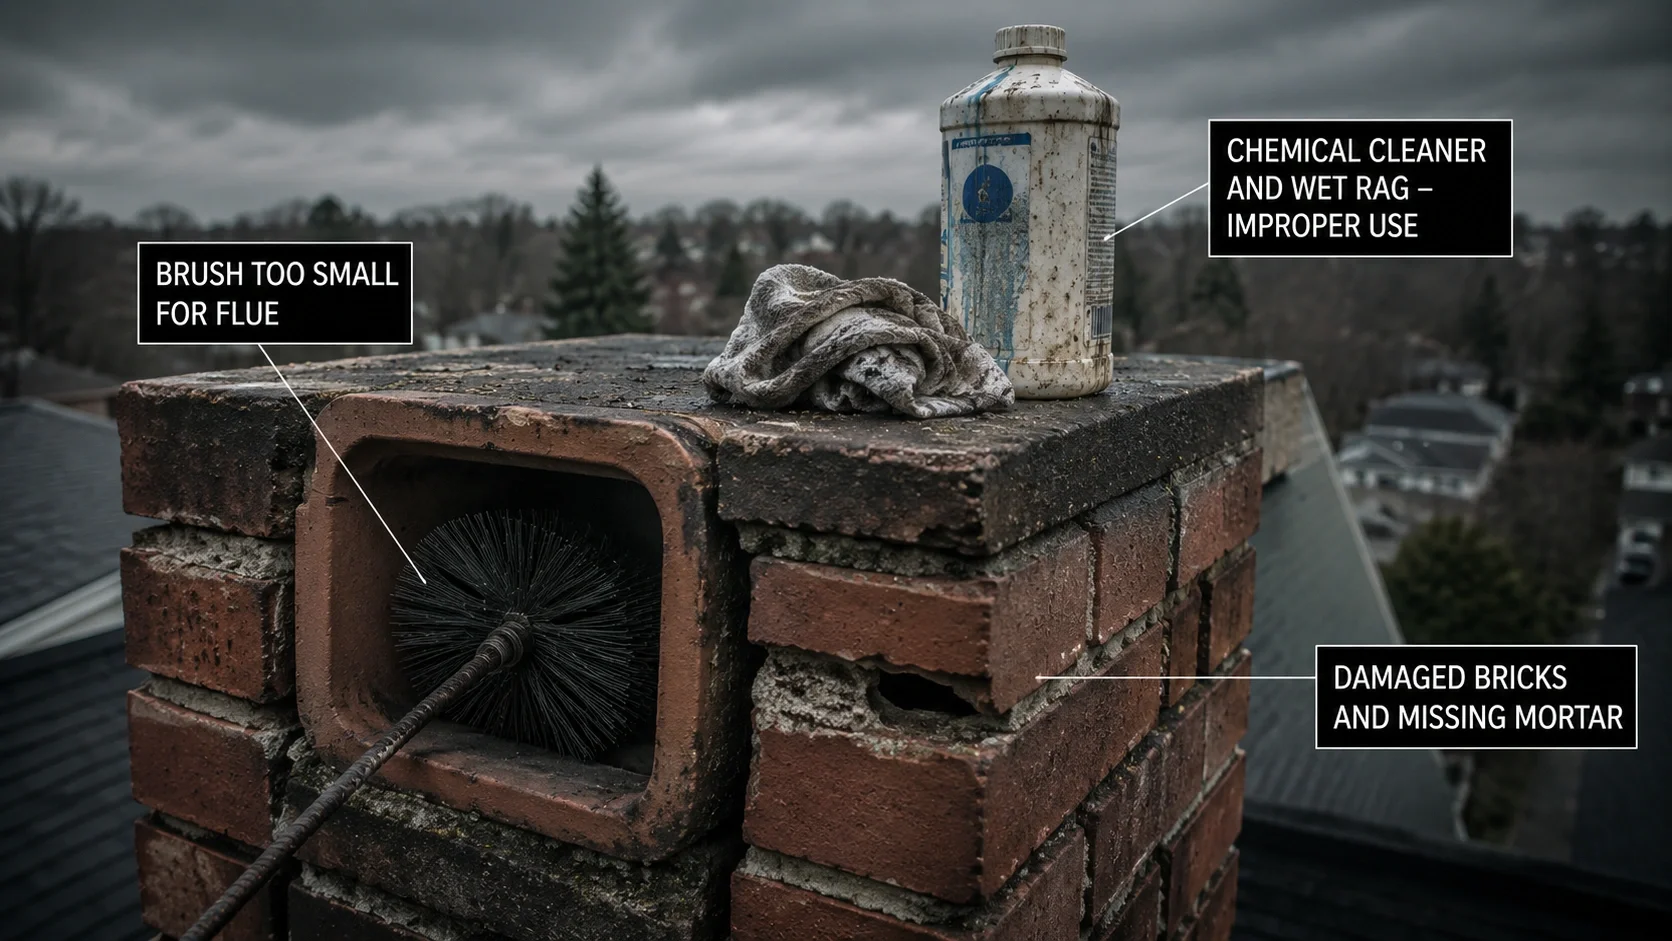
Even with the right tools and knowledge, it's easy to make mistakes that can reduce cleaning effectiveness or potentially cause damage. Here are common pitfalls to avoid:
- Using the Wrong Brush Size: A brush that's too small won't effectively clean the chimney walls, while one that's too large can get stuck or damage the flue. Always measure your chimney precisely before purchasing a brush.
- Neglecting Safety Equipment: Skipping protective gear can expose you to harmful particulates and increase the risk of eye injuries. Always wear appropriate protection.
- Cleaning During Wet Weather: Moisture can make creosote more difficult to remove and increase the risk of slipping on roofs. Choose a dry day for cleaning.
- Ignoring the Smoke Shelf: This horizontal shelf behind the damper is a prime location for creosote accumulation and is often overlooked during cleaning.
- Using Chemical Cleaners Incorrectly: Creosote removers must be applied according to manufacturer instructions. Misuse can be ineffective or potentially damage the chimney.
- Forgetting to Check the Chimney Cap: A damaged or missing chimney cap can allow water and debris to enter, accelerating deterioration and creosote formation.
- Disposing of Creosote Improperly: Creosote contains harmful chemicals and should be disposed of according to local regulations, not added to compost or gardens.
- Skipping the Final Inspection: Always visually inspect the chimney after cleaning to ensure you've removed as much creosote as possible and to check for any issues that may have been hidden by buildup.
For a comprehensive list of what to look for during and after cleaning, refer to our chimney inspection guide.
Seasonal Chimney Maintenance Calendar

Incorporating chimney maintenance into your seasonal routine ensures nothing is overlooked and your fireplace remains safe and efficient year-round. Here's a recommended maintenance calendar:
Spring
- Schedule a professional inspection if you didn't have one before heating season
- Perform a thorough cleaning after the heating season ends
- Check for any winter damage to the chimney exterior
- Repair any minor mortar damage before it worsens
Summer
- Ensure the chimney cap is in good condition to prevent summer rain from entering
- Check for and remove any animal nests or debris
- Consider applying a water repellent to the chimney exterior if needed
- For detailed summer care tips, see our summer fireplace care guide
Fall
- Inspect the chimney before the heating season begins
- Perform any necessary cleaning before using the fireplace
- Check that the damper operates smoothly
- Stock up on properly seasoned firewood
- Follow our fall fireplace inspection checklist for a thorough review
Winter
- Monitor creosote buildup more frequently if using the fireplace daily
- Perform additional cleanings as needed during heavy use periods
- Watch for warning signs like smoke backup or unusual odors
- Keep the area around the chimney clear of snow and ice
- For winter-specific maintenance, see our winter fireplace preparation guide
For a complete approach to year-round fireplace care, our seasonal fireplace checklist provides detailed tasks for each season to keep your entire fireplace system in optimal condition.
Frequently Asked Questions About Chimney Cleaning
The time required depends on several factors, including chimney height, diameter, creosote buildup level, and your experience. For a standard residential chimney with moderate creosote, expect to spend 1-3 hours on the cleaning process, plus additional time for preparation and cleanup. First-time cleanings may take longer as you familiarize yourself with the process.
Yes, bottom-up cleaning is possible and sometimes necessary when roof access is unsafe or impractical. However, top-down cleaning is generally more effective because gravity helps pull debris down, and you can apply more downward pressure with the brush. If cleaning from the bottom, you'll need to be extra thorough and may need to make multiple passes to achieve the same results.
Yes, even though gas fireplaces produce minimal creosote, the chimney still requires annual inspection and occasional cleaning. Debris, animal nests, and other obstructions can block the flue, preventing proper venting of combustion gases. This can lead to dangerous carbon monoxide buildup in your home. For gas-specific maintenance, refer to our gas fireplace maintenance guide.
If your brush becomes stuck, don't force it, as this could damage the chimney liner. Instead, try rotating it in the opposite direction while gently pulling. If this doesn't work, you may need to disconnect the rods and carefully work the brush loose from below. In severe cases, you may need to call a professional chimney sweep who has specialized tools to extract stuck brushes without causing damage.
A properly cleaned chimney should have minimal to no visible creosote on the interior walls when inspected with a flashlight. The surface should feel relatively smooth to the touch (if accessible), and there should be no large deposits remaining, especially in problem areas like the smoke shelf. If you can still see substantial creosote after cleaning, additional passes with the brush may be necessary.
When used according to manufacturer instructions, chemical creosote removers can be safe and effective, particularly for removing Stage 2 and some Stage 3 creosote. These products work by changing the chemical composition of creosote, making it easier to brush away. However, they should never be used as a substitute for mechanical cleaning, and some products may not be suitable for all chimney types. Always read and follow the manufacturer's guidelines carefully.
Conclusion: Maintaining a Safe and Efficient Chimney

Regular chimney cleaning is an essential responsibility for any homeowner with a fireplace. By understanding the importance of this maintenance task, recognizing when cleaning is needed, using the right tools and techniques, and following proper burning practices, you can significantly reduce the risk of chimney fires and ensure your fireplace operates safely and efficiently.
Whether you choose to clean your chimney yourself or hire a professional, the key is consistency. Establishing a regular maintenance schedule and sticking to it will prevent creosote from reaching dangerous levels and help identify potential problems before they become serious safety hazards.
Remember that chimney cleaning is just one aspect of comprehensive fireplace maintenance. For a complete approach to keeping your fireplace in top condition, explore our fireplace maintenance section, which includes detailed guides on cleaning different components, troubleshooting common issues, and preparing your fireplace for seasonal use.
By investing time and effort in proper chimney maintenance, you're not only protecting your home and family but also enhancing your fireplace experience—enjoying warmer, more efficient fires with less smoke, fewer odors, and greater peace of mind.