
DIY Electric Fireplace: Complete Installation Guide
Transform any room with a custom electric fireplace. Learn how to plan, build, and install your own electric fireplace with our comprehensive guide.
GET STARTED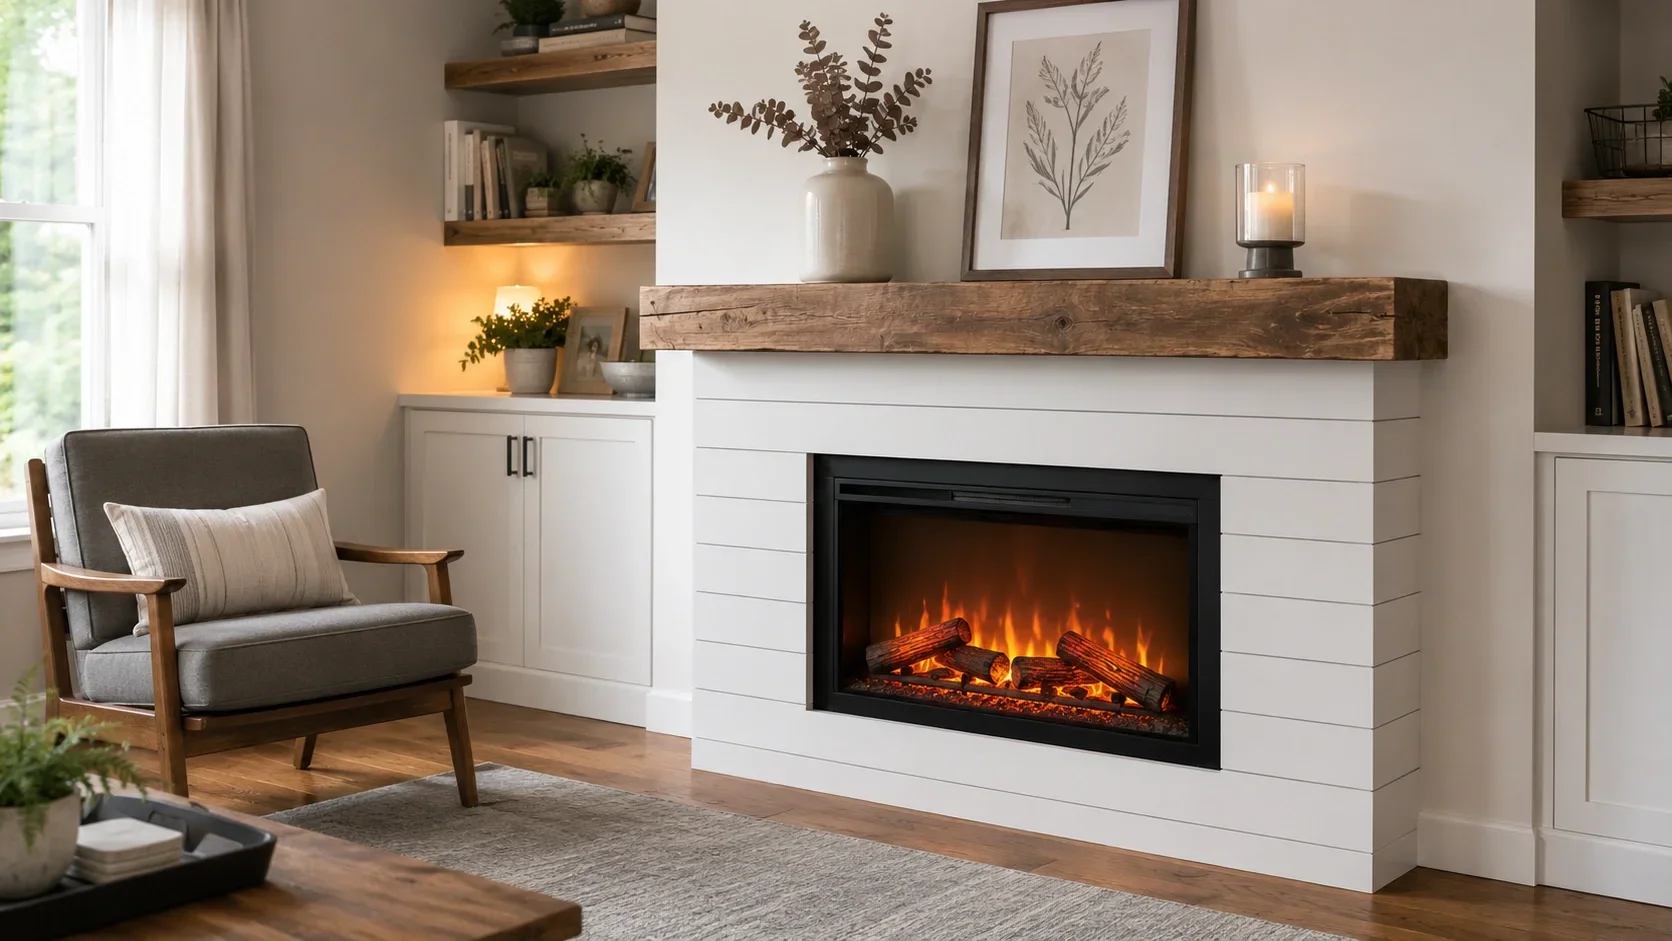
Creating a DIY electric fireplace is an excellent way to add warmth, ambiance, and value to your home without the complexity of gas or wood-burning alternatives. Electric fireplaces offer the beauty of a traditional fireplace without the need for venting, chimneys, or complex installations, making them perfect for DIY enthusiasts.
Whether you're looking to create a focal point in your living room, add warmth to your bedroom, or enhance a corner space, this comprehensive guide will walk you through everything you need to know about building your own electric fireplace from planning to completion.
Why Choose a DIY Electric Fireplace?
• No venting required - Unlike gas or wood fireplaces, electric units don't need chimneys or vents
• Easier installation - Most electric fireplaces simply plug into a standard outlet
• Customizable design - Build a surround that matches your home's aesthetic
• Budget-friendly - Significantly lower investment tier than professional installation of other fireplace types
• Zone heating - Efficiently heat specific areas without warming the entire house
Recommended Electric Fireplace Units
⚠️ AFFILIATE DISCLOSURE: This website contains affiliate links. As an Amazon Associate, we earn from qualifying purchases. If you make a purchase through these links, we may receive a small commission at no additional cost to you. Read our full affiliate policy.

duraflame Freestanding Electric Fireplace Stove Heater with 3D Flame Effect for 1,000 Sq. Ft. Room, Black
Check price on Amazon
Tehanld 60" Ultra-Thin Electric Fireplace Heater, Recessed Wall Mounted | 60-99°F Thermostat, 0/750/1500W Fast Heating, Child Lock, 12H Timer, Realistic Flame, Log & Crystal for Living Room
Check price on Amazon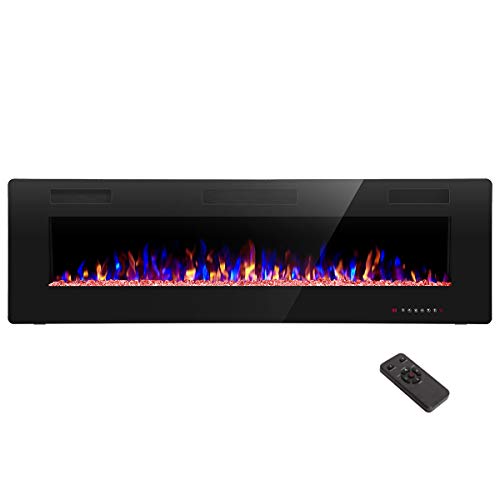
R.W.FLAME 60" Recessed and Wall Mounted Electric Fireplace, Low Noise, Fit for 2 x 6 Stud, Remote Control with Timer, Touch Screen, Adjustable Flame Color and Speed, 750-1500W
Check price on Amazon
OLIXIS Freestanding Electric Fireplace, 19" Small Space Heater for Indoor | 3D Flame Effect, 5110 BTU, 750W & 1500W Heat Mode, Easy Control,Tempered Glass Window, for Living Room Bedroom Office, Black
Check price on Amazon
Electric Fireplace Heater Stove with 3D Flame, 1000/1500W & Flame-Only Mode | Freestanding Electric Fireplace Heater with 5100 BTU Output, Thermostat, ETL, Overheat Protection, for Indoor Use, 22.28 in
Check price on Amazon
EXNOS 23.6-Inch Freestanding Electric Fireplace Heater with 3D Flame Effect | 750W/1500W Dual‑Power Heater, Remote, 1‑12H Timer, Overheat & Tip‑Over Protection, 59‑99°F, Heats up to 300 sq.ft. Indoor Use
Check price on Amazon
EUHOMY 50 Inch Electric Fireplace Recessed and Wall Mounted | Adjustable Flame Color, Remote Control, Timer, Touch Screen, Log and Crystal, 750W/1500W Fireplace Heater
Check price on Amazon
PRAISUN 70'' Fireplace TV Stand with 48'' Electric Fireplace | French Country, for 65, 75 inch TV, Distressed White, Entertainment Center, Vintage, TV Console, Electric Fireplace Heater
Check price on AmazonPlanning Your DIY Electric Fireplace Project
Before diving into construction, proper planning is essential for a successful DIY electric fireplace project. This stage will determine the overall success of your build and help avoid costly mistakes.
Determine Your Purpose
Understanding your primary goal will guide all subsequent decisions:
- Ambiance focus: If your main goal is creating a visual focal point, you can opt for a simpler electric fireplace insert with realistic flame effects rather than prioritizing heating capacity.
- Heating focus: For practical heating, you'll need to calculate the BTU requirements based on your room size and insulation quality.
- Property value: If increasing home value is your goal, focus on high-quality materials and a design that complements your home's architecture.
Select the Right Location
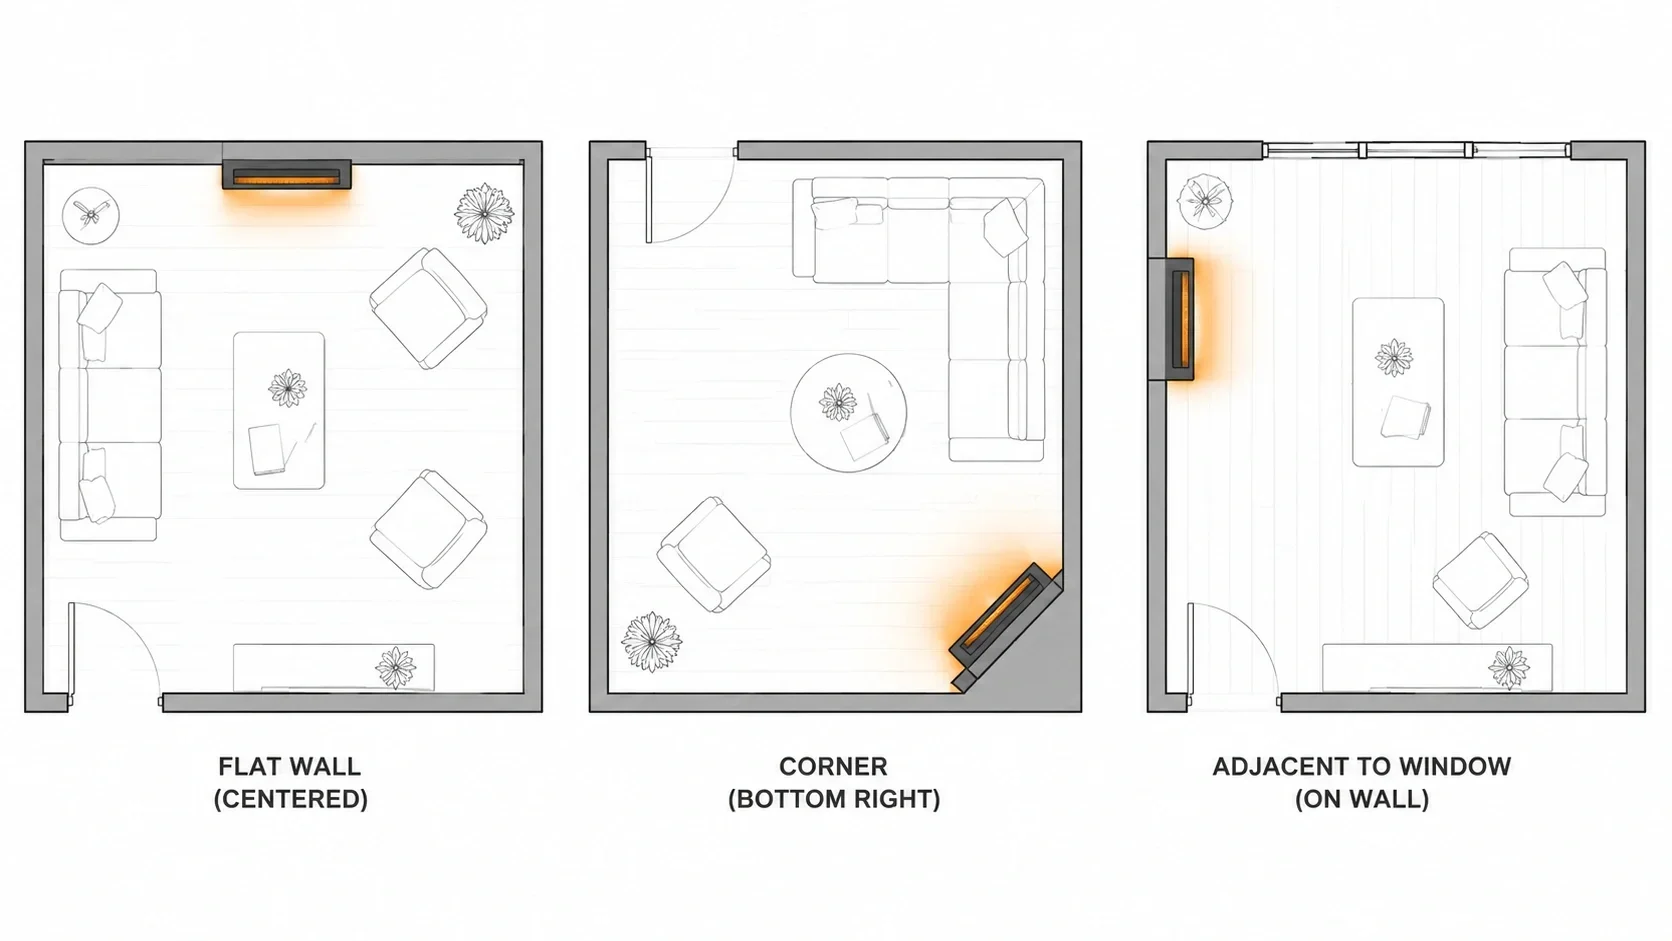
Consider these factors when choosing where to install your DIY electric fireplace:
- Available wall space: Measure the area where you plan to install the fireplace, accounting for the surround and mantel you'll build.
- Proximity to electrical outlets: Most electric fireplaces need to be plugged into a standard 120V outlet. Consider the distance to the nearest outlet and whether you'll need to run an extension cord or have an outlet installed.
- Room layout: Consider traffic flow, furniture placement, and sight lines from different areas of the room.
- Wall construction: Determine if you're working with drywall, plaster, or another material, as this will affect your installation approach.
Choose Your Electric Fireplace Unit
The heart of your DIY project is the electric fireplace insert itself. There are several types to consider:
- Wall-mounted units: Sleek and modern, these wall fireplaces are perfect for contemporary spaces and can be installed with minimal construction.
- Insert units: Designed to be framed into a wall or existing fireplace opening, these offer the most flexibility for custom surrounds.
- Freestanding units: These standalone fireplaces come in their own cabinet and can simply be placed against a wall with minimal DIY work needed.
- Corner units: Specifically designed for corner installations, these can help maximize space in smaller rooms.
Pro Tip: Consider Heating Technology
When selecting your electric fireplace unit, consider the heating technology. Infrared heaters warm objects directly rather than heating the air, making them more efficient for spot heating. Fan-forced units heat the air and are better for warming an entire room.
Materials and Tools Needed
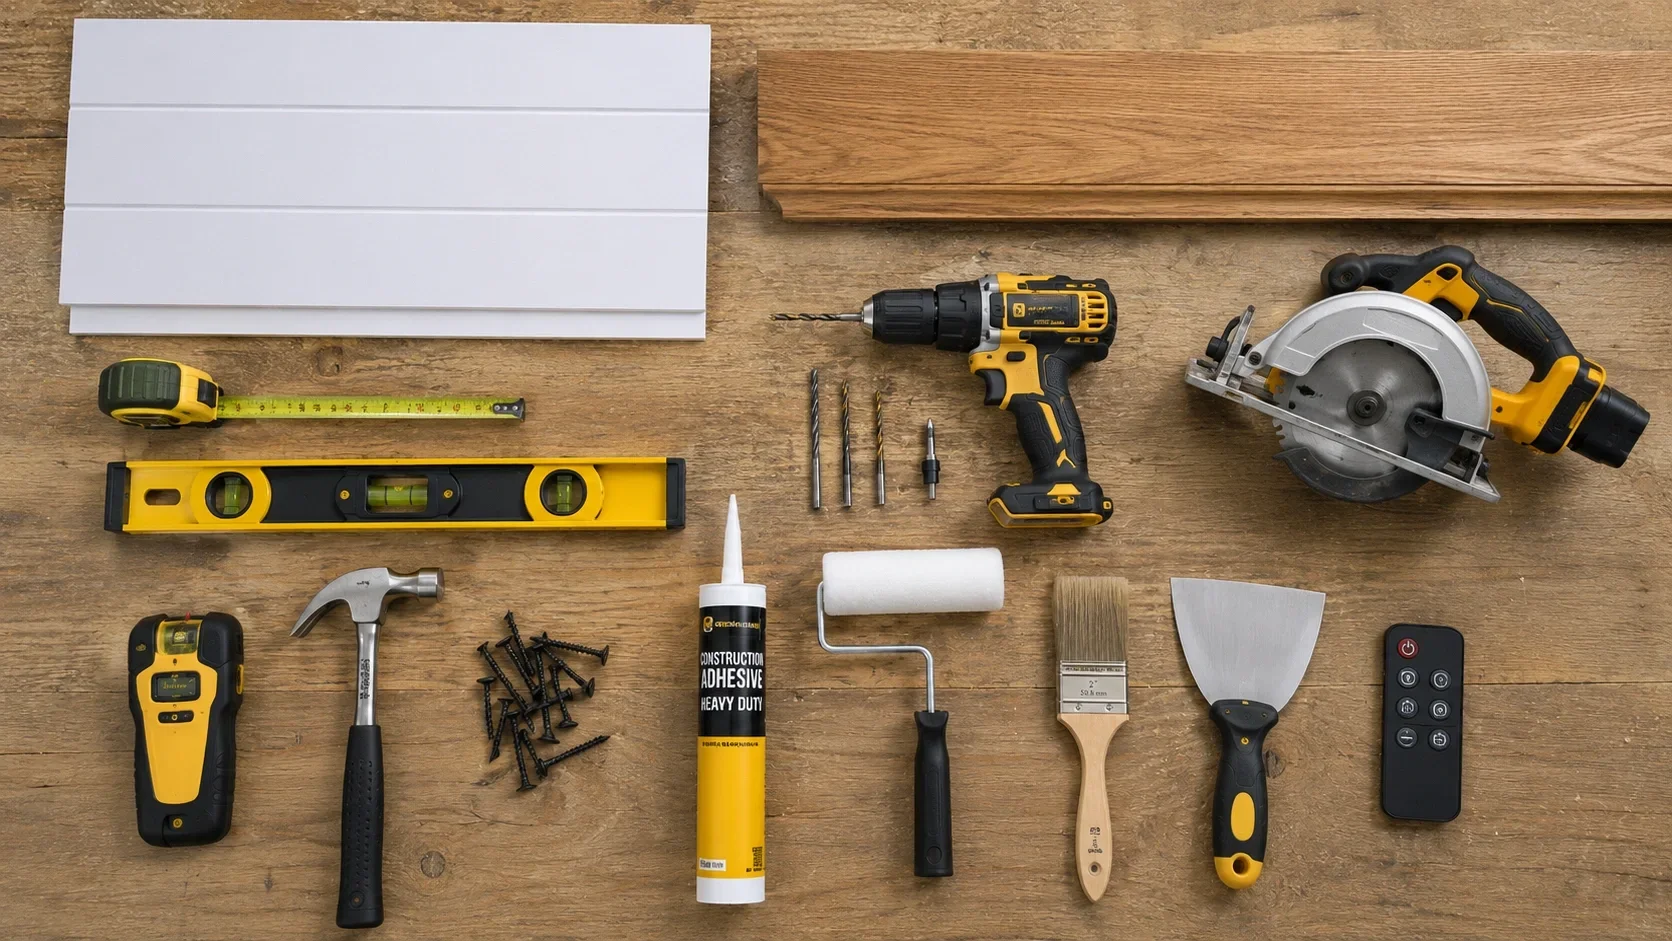
The materials you'll need depend on your design vision, but here's a comprehensive list to consider:
Essential Materials
- Electric fireplace insert (selected based on your needs)
- 2x4 lumber for framing
- Drywall or plasterboard
- Mantel board (solid wood, MDF, or other material)
- Surround material (tile, stone veneer, shiplap, or paintable MDF)
- Trim and molding
- Screws, nails, and construction adhesive
- Joint compound and tape (if using drywall)
- Primer and paint
- Electrical components (if adding an outlet)
Required Tools
- Measuring tape and level
- Stud finder
- Circular saw or miter saw
- Drill with various bits
- Screwdriver set
- Hammer
- Utility knife
- Trowel (if using tile or stone)
- Sanding block or electric sander
- Paint brushes and rollers
- Safety equipment (goggles, mask, gloves)
Investment Tiers
One of the advantages of a DIY electric fireplace is the potential for significant savings compared to professional installation of other fireplace types. Here's a typical investment tier breakdown:
| Component | DIY Investment Tier | Professional Investment Tier |
|---|---|---|
| Electric Fireplace Insert | Entry-level to Mid-range | Entry-level to Mid-range |
| Framing Materials | Entry-level | Entry-level to Mid-range |
| Surround Materials | Entry-level to Mid-range | Mid-range to Premium |
| Mantel | Entry-level to Mid-range | Mid-range to Premium |
| Electrical Work | Entry-level (or none) | Mid-range |
| Finishes (Paint, Trim, etc.) | Entry-level to Mid-range | Entry-level to Mid-range |
| Overall Tier | Entry-level to Mid-range | Mid-range to Premium |
Budget-Friendly Tips
• Repurpose materials from other projects for the surround or mantel
• Consider faux materials that look like stone or brick but sit in a lower tier
• Use paint techniques to create the appearance of higher-tier materials
• Look for seasonal sales on electric fireplace inserts during off-season months
Step-by-Step Installation Guide
Now that you've planned your project and gathered materials, follow these detailed steps to build your DIY electric fireplace:
Step 1: Prepare the Area
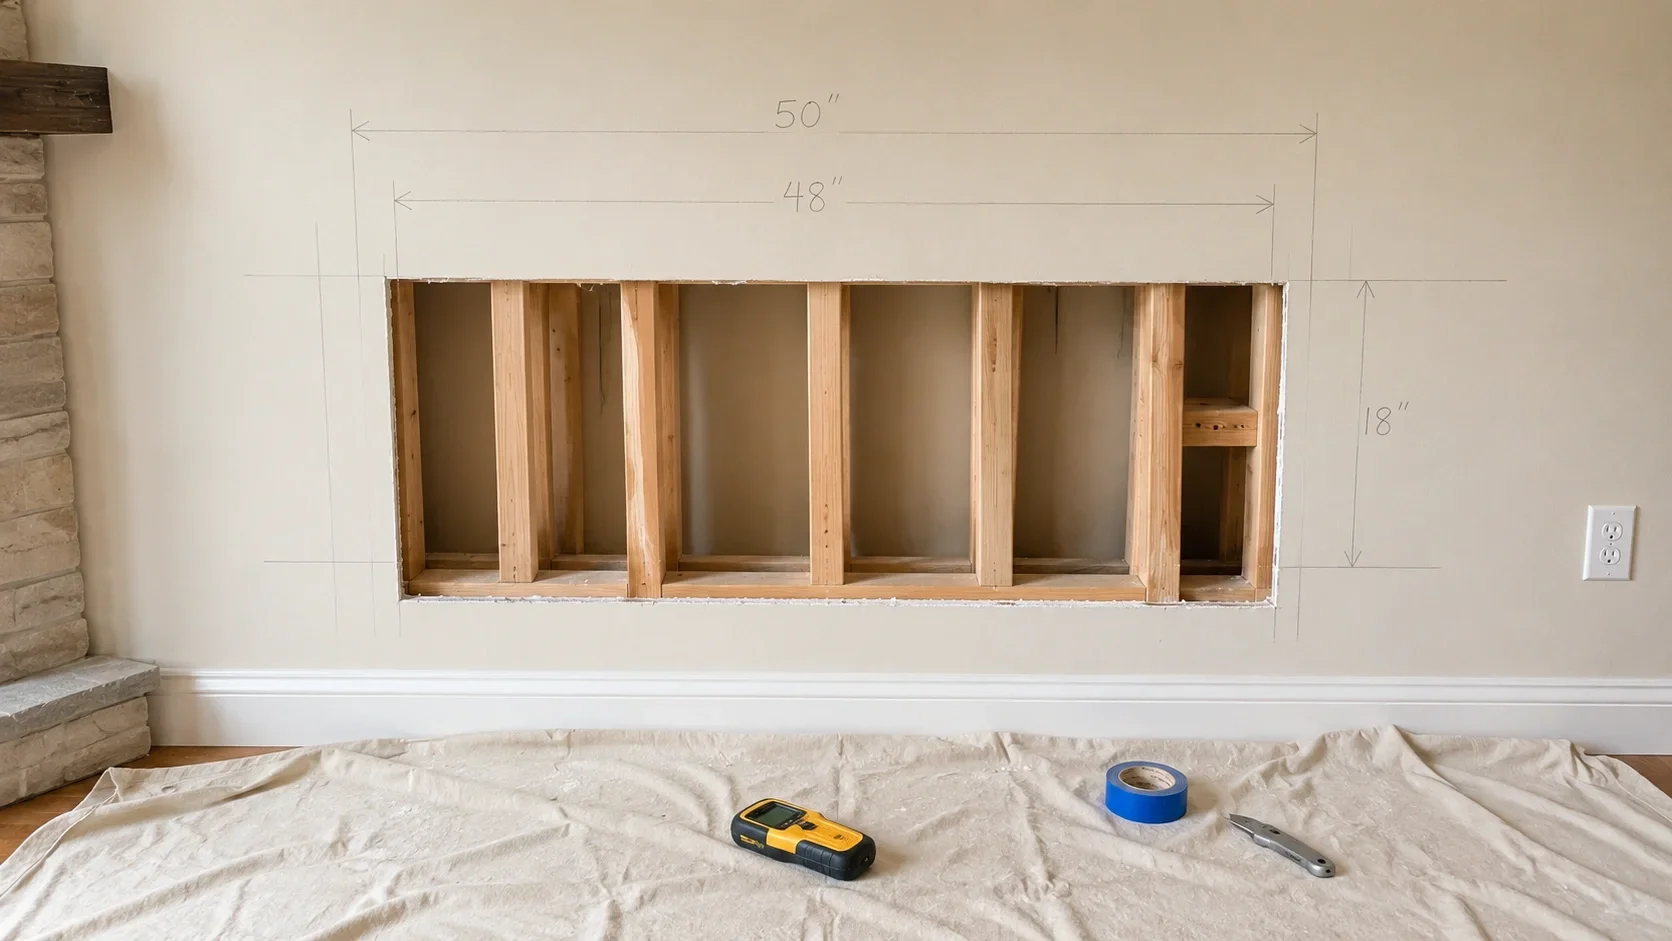
Begin by clearing the area where you'll install the fireplace and marking the dimensions on the wall:
- Use a stud finder to locate and mark wall studs in the installation area.
- Mark the dimensions of your fireplace unit on the wall, adding at least 2 inches on each side for the framing.
- If you need to add an electrical outlet, this is the time to do it or hire an electrician.
- Cut into the wall to create the opening for your fireplace, being careful to avoid any electrical wiring or plumbing.
Safety First
Always turn off power to the area before cutting into walls. If you're unsure about electrical work, consult with a licensed electrician. Improper electrical installation can create fire hazards and code violations.
Step 2: Build the Frame
Construct a sturdy frame to house your electric fireplace insert:
- Cut 2x4 lumber to create a frame that's slightly larger than your fireplace unit.
- Attach the frame to the wall studs using wood screws, ensuring it's level and plumb.
- Add cross-bracing for additional support, especially if your fireplace unit is heavy.
- Create a recessed area for the fireplace insert that allows for proper airflow around the unit.
- Install nailing strips around the perimeter for attaching the surround material later.
Step 3: Install the Fireplace Insert
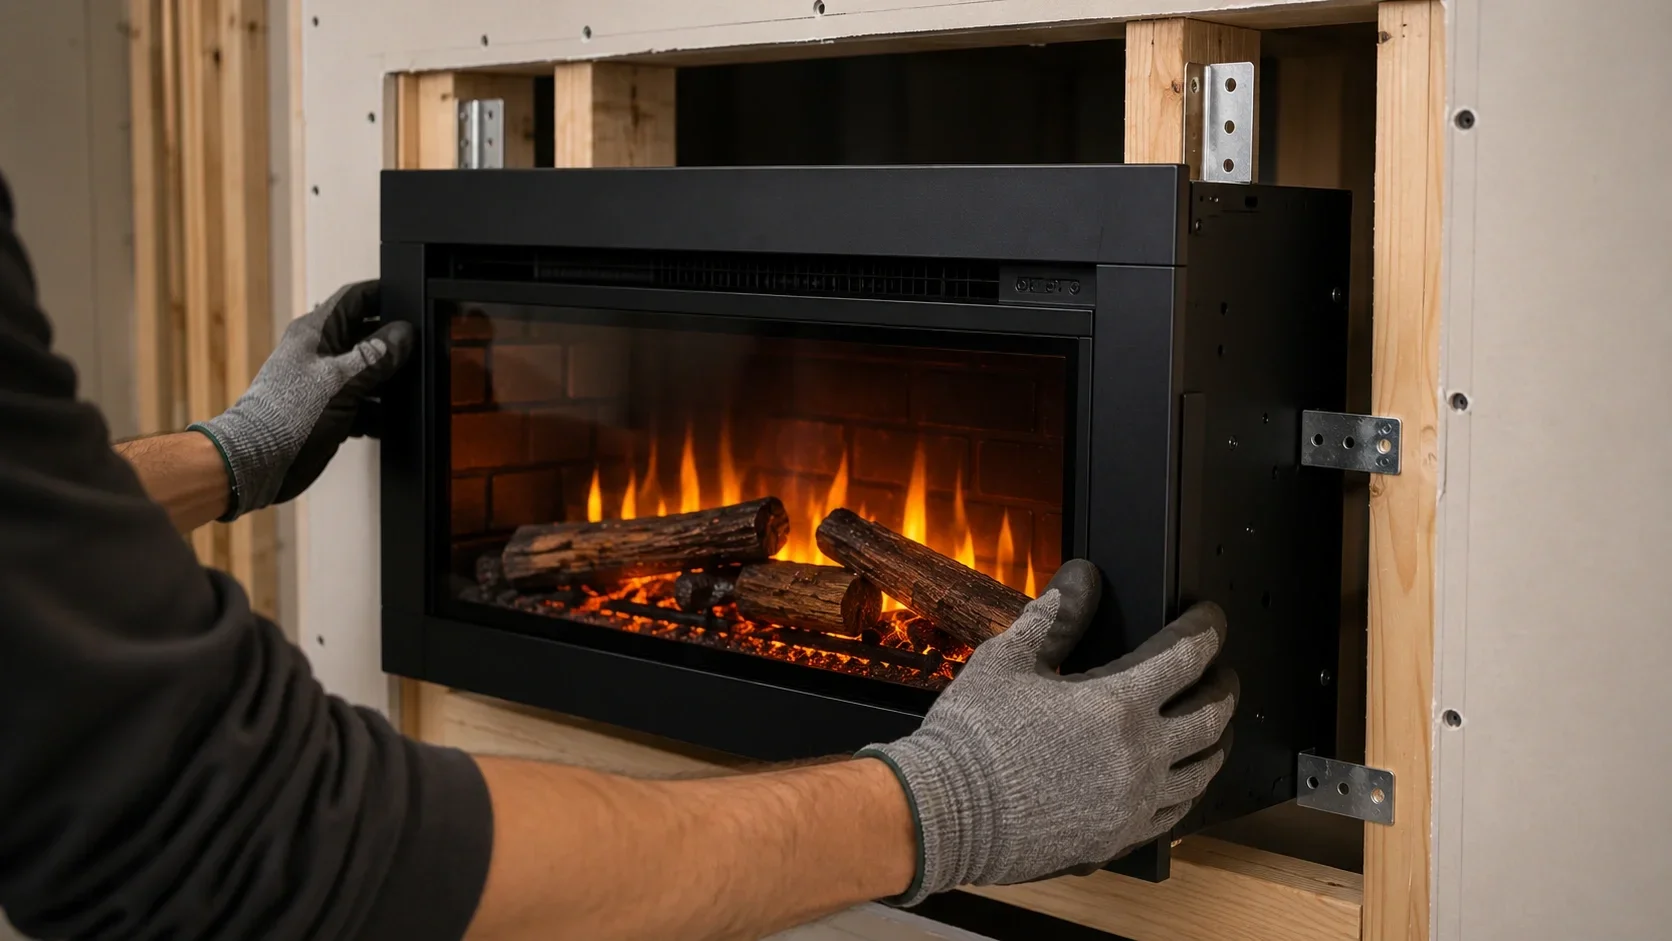
With the frame in place, it's time to install the heart of your project:
- Test the electric fireplace unit before installation to ensure it works properly.
- Carefully lift the unit into the framed opening (this may require two people for larger units).
- Center the unit within the frame and use the mounting brackets provided by the manufacturer to secure it.
- Ensure there's adequate clearance around the unit as specified in the manufacturer's instructions.
- Plug in the unit and test it again to confirm it's working correctly in its installed position.
Step 4: Build the Surround
The surround is what gives your DIY electric fireplace its custom look. Here are approaches for different materials:
For Tile Surround:
- Apply cement backer board to the framing around the fireplace opening.
- Plan your tile layout, starting from the center and working outward.
- Apply thin-set mortar to the backer board using a notched trowel.
- Press tiles into place, using spacers to maintain consistent gaps.
- Allow the mortar to dry completely (usually 24 hours) before applying grout.
- Apply grout, wipe away excess, and seal once dry.
For Shiplap Surround:
- Cut shiplap boards to size, accounting for the fireplace opening.
- Start at the bottom and work upward, attaching boards to the nailing strips with a nail gun.
- Ensure each board is level before securing.
- Fill nail holes with wood filler and sand smooth once dry.
- Apply paint or stain as desired.
For Stone Veneer Surround:
- Apply a scratch coat of mortar to the cement backer board.
- Starting at the bottom corners, apply mortar to the back of each stone and press firmly into place.
- Work in small sections, staggering joints for a natural look.
- Fill gaps between stones with mortar, using a grout bag for precision.
- Brush away excess mortar before it dries and clean stones with a wet sponge.
Step 5: Install the Mantel

The mantel adds the finishing touch to your DIY electric fireplace:
- Determine the height for your mantel (typically 12-18 inches above the fireplace opening).
- Mark the location and use a level to ensure it's perfectly horizontal.
- Install mounting brackets to the wall studs at the marked height.
- Prepare your mantel board by cutting to size and finishing as desired (paint, stain, etc.).
- Place the mantel on the brackets and secure from underneath.
- Add decorative corbels or brackets for additional support and visual interest if desired.
Design Tip: Mantel Proportions
For a balanced look, your mantel should extend 3-6 inches beyond each side of the fireplace opening. The depth should be proportional to the room size—deeper mantels work better in larger spaces, while shallower ones suit smaller rooms.
Step 6: Add Finishing Touches
Complete your DIY electric fireplace with these final details:
- Install baseboards or trim around the bottom of the surround to create a finished edge.
- Add crown molding above the mantel for a more polished look.
- Consider adding a hearth extension in front of the fireplace for safety and aesthetic purposes.
- Style the mantel with decorative items that complement your room's design.
- Install a remote control holder nearby for convenient operation.
Design Ideas and Inspiration
Your DIY electric fireplace can take many forms depending on your style preferences. Here are some popular design approaches:
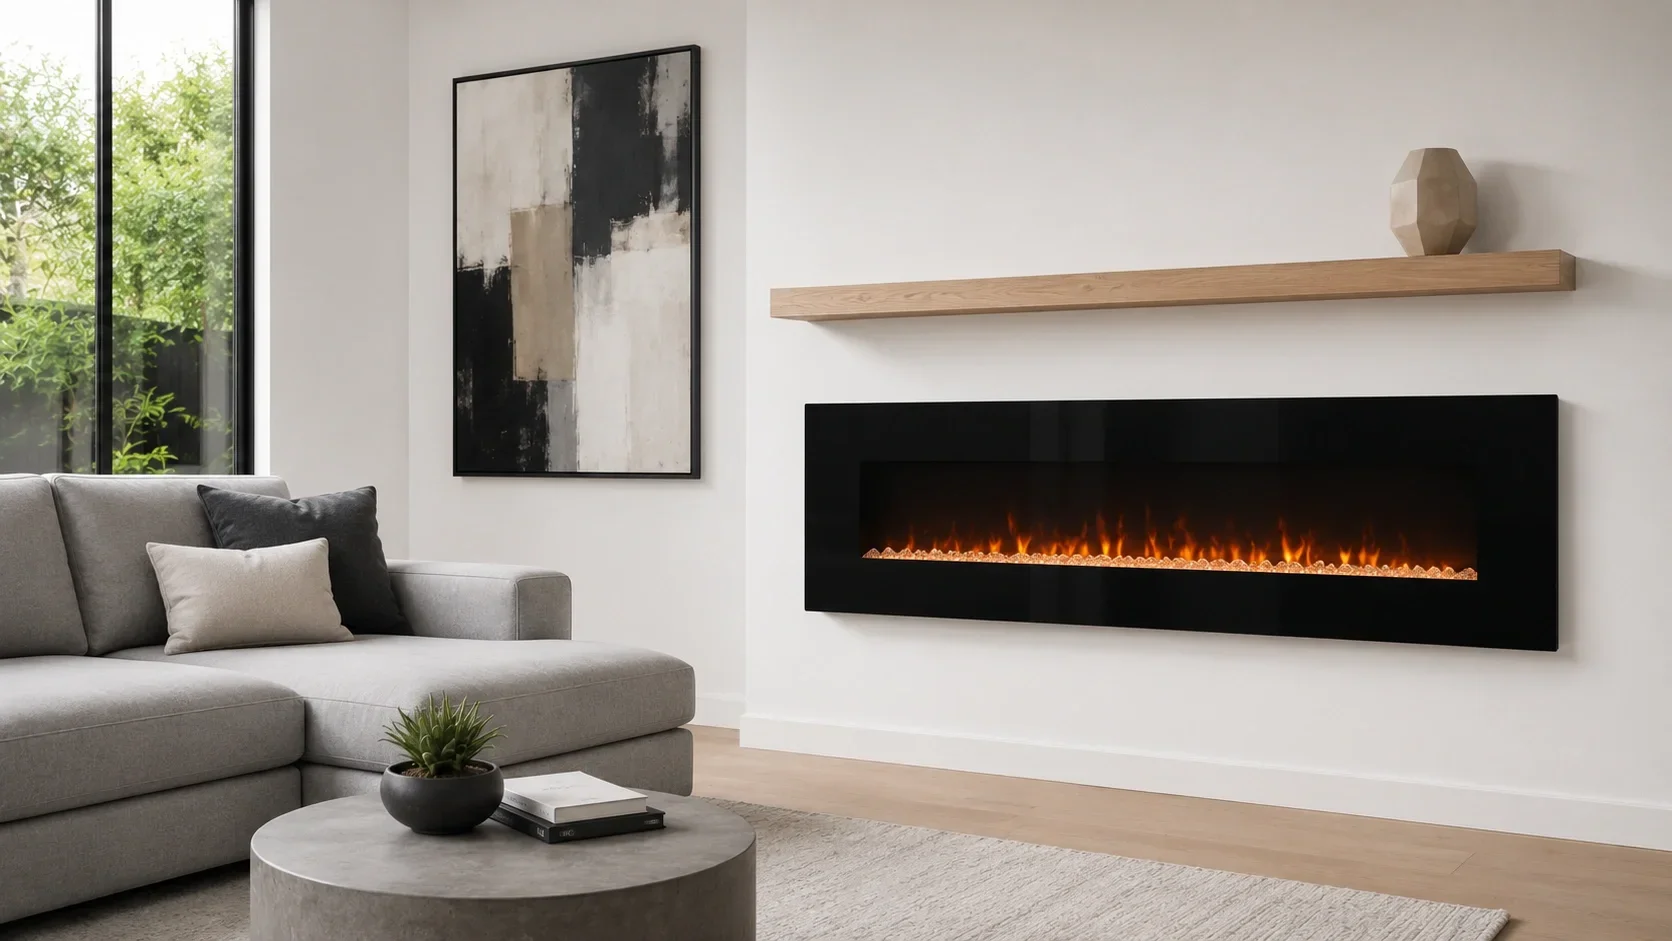
Modern Minimalist
For a contemporary look, consider a wall-mounted electric fireplace with a sleek, frameless design. Surround it with a simple surround in white or light gray, and add a floating mantel in a complementary material like oak or walnut. Keep decorative elements minimal for a clean, uncluttered appearance.
Rustic Charm
Create a cozy, cabin-like atmosphere by framing your electric fireplace with reclaimed wood. Add a chunky wooden mantel with natural edges, and consider incorporating stone elements at the base. This style works particularly well with electric fireplaces that feature realistic log sets.
Traditional Elegance
For a classic look, build a surround with decorative molding and columns. Use a painted wood surround with raised panel details, and add an ornate mantel with carved details. This approach can make your electric fireplace indistinguishable from a traditional wood-burning fireplace.
Space-Saving Corner Design
Maximize your space by building a corner electric fireplace. Use triangular shelves above the fireplace for display space, and consider a built-in bench below for seating. This approach is perfect for smaller rooms where floor space is at a premium.
Media Center Integration
Design your DIY electric fireplace as part of a custom media center. Build shelving on either side for media components, and position your television above the fireplace. This creates a cohesive focal point that serves multiple functions in your living space.
Maintenance and Care
One of the advantages of electric fireplaces is their minimal maintenance requirements. However, regular care will ensure your DIY project continues to function beautifully for years to come.
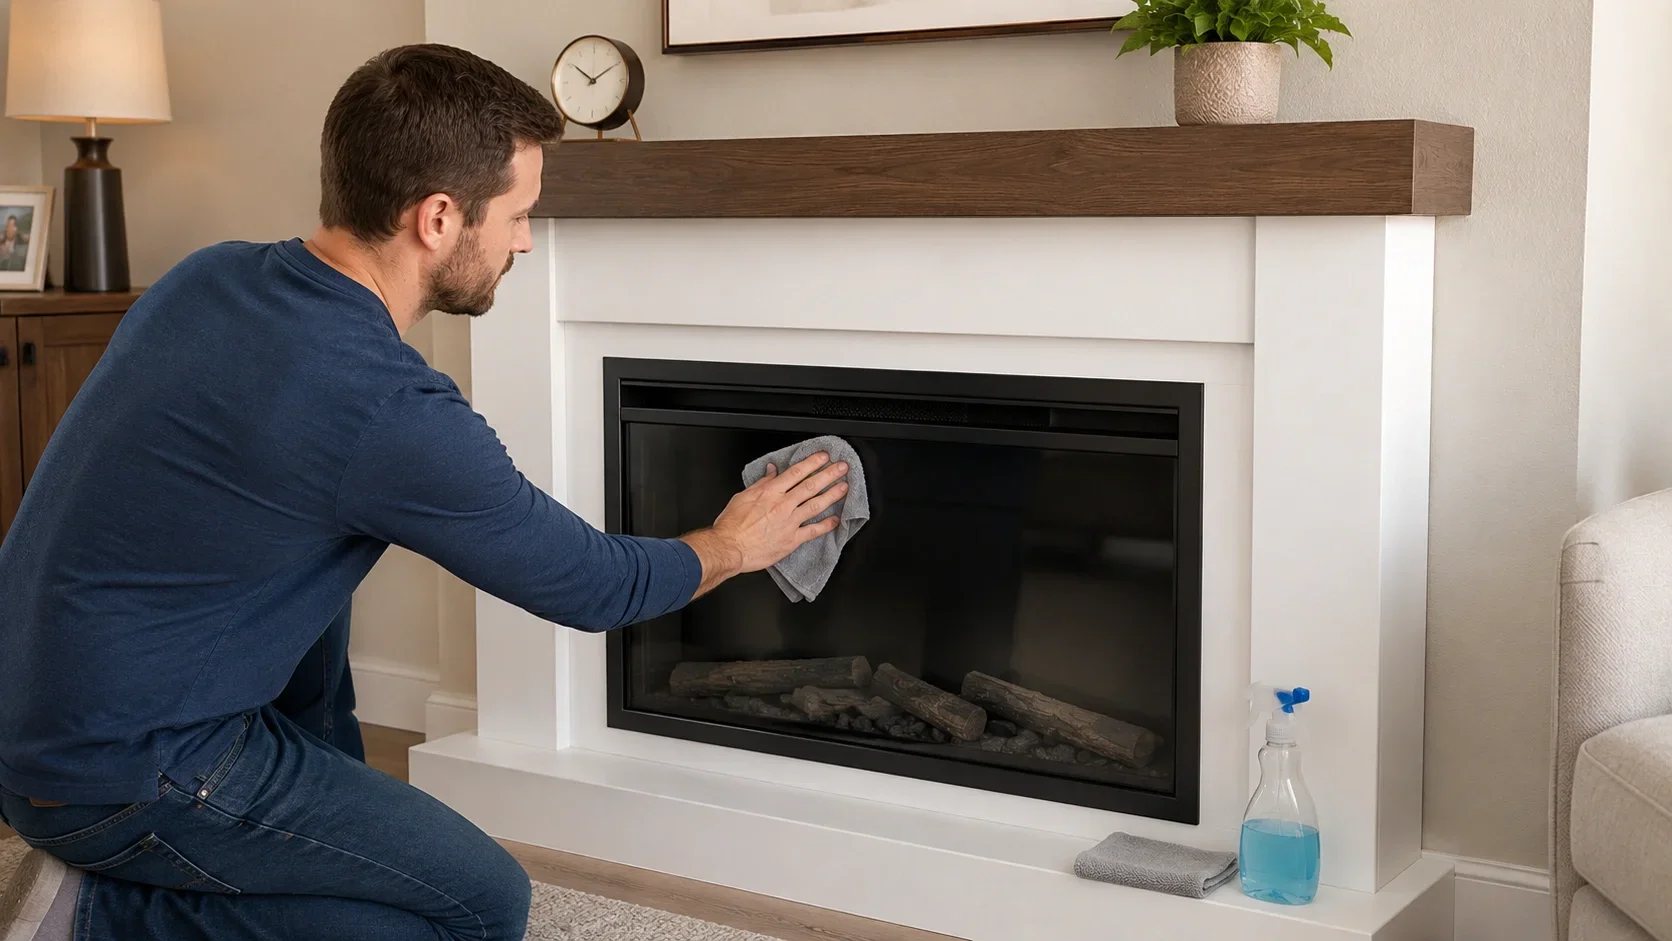
Regular Maintenance Tasks
- Dust the unit regularly - Use a soft cloth to remove dust from the fireplace unit and surround. For the electric fireplace itself, follow the manufacturer's guidelines.
- Clean the glass front - Use a glass cleaner or a mixture of vinegar and water to keep the viewing window clear.
- Check electrical connections - Periodically inspect the cord and plug for any signs of wear or damage.
- Test the heating function - Even if you primarily use the flame effect, test the heating function periodically to ensure it's working properly.
- Maintain the surround - Depending on your materials, this may include regrouting tile, repainting wood, or sealing stone.
Seasonal Considerations
- Before winter: Clean the unit thoroughly and test all functions before the heating season begins.
- During winter: Keep the area around the fireplace clear of flammable materials when using the heating function.
- After winter: Clean the unit and consider covering it to protect from dust during the off-season.
Energy Efficiency Tips
• Use the flame effect without heat during mild weather for ambiance without energy consumption
• Take advantage of the thermostat settings to maintain a comfortable temperature without overheating
• Close doors to the room where the fireplace is located to maximize heating efficiency
• Consider using a smart controller to schedule heating times and avoid wasted energy
Common Challenges and Solutions
Even well-planned DIY projects can encounter challenges. Here are solutions to common issues:
Uneven Wall Surface
If your wall isn't perfectly flat, use shims behind the framing to create a level surface. For significant irregularities, consider adding a layer of furring strips before attaching your final surround material.
Electrical Outlet Placement
If the nearest outlet isn't conveniently located, you have several options:
- Have an electrician install a new outlet directly behind the fireplace (ideal but adds to project scope)
- Use a paintable cord cover to discreetly route the cord to an existing outlet
- Consider a hardwired installation for a cleaner look (requires electrical knowledge)
Insufficient Heat Output
If your electric fireplace isn't heating effectively:
- Check that the BTU rating is appropriate for your room size
- Ensure there's adequate clearance around the unit for airflow
- Check that the heating element and fan are functioning properly
- Consider supplemental insulation in the room to improve heat retention
Unrealistic Flame Effect
If the flame effect doesn't look realistic enough:
- Clean the inside of the unit to remove dust that can affect the flame display
- Adjust the brightness and speed settings to find a more natural appearance
- Consider adding reflective materials behind the unit to enhance the flame effect
- Upgrade to a unit with water vapor technology for the most realistic flame effect
Safety Considerations
Important Safety Guidelines
While electric fireplaces are generally safer than other types, proper precautions are still essential:
• Always follow the manufacturer's installation and operating instructions
• Keep flammable materials at least 3 feet away from the fireplace when in use
• Never attempt to modify the fireplace unit itself
• Ensure the fireplace is plugged into a properly grounded outlet
• Don't use extension cords permanently; have an outlet installed if needed
• Turn off and unplug the fireplace when not in use for extended periods
Unlike gas or wood-burning fireplaces, electric models don't produce carbon monoxide or require ventilation considerations. However, they still draw significant power, so ensure your electrical system can handle the load without tripping breakers.
When to Call a Professional
While this is a DIY project, certain aspects may require professional assistance:
- Electrical work: If you need to add or move outlets, or if you're unsure about electrical capacity
- Load-bearing walls: If your installation requires cutting into a load-bearing wall
- Complex designs: If your design involves intricate tile work or stone installation beyond your skill level
- Permit requirements: Some jurisdictions require permits for electrical work or structural modifications
DIY vs. Professional: Making the Right Choice
For most electric fireplace installations, the DIY approach is perfectly viable and can save significant money. However, be honest about your skill level and the complexity of your design. A simple surround with a plug-in unit is very DIY-friendly, while a complex built-in with hardwired electrical and custom stone work might benefit from professional help for certain aspects.
Conclusion
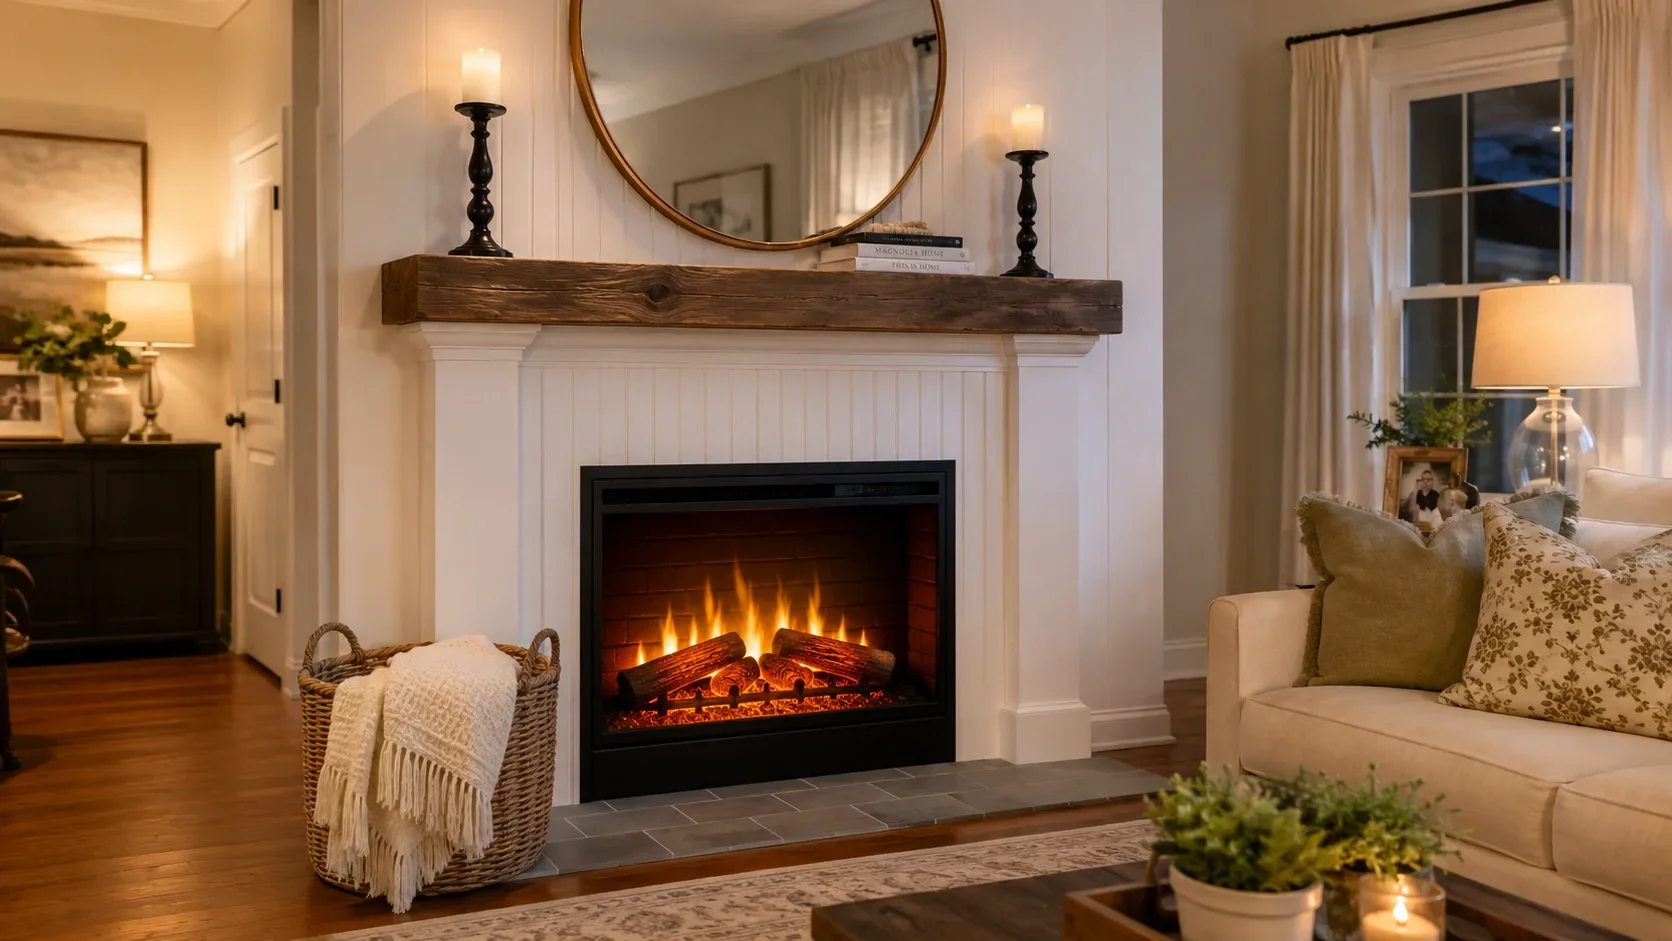
Building a DIY electric fireplace is a rewarding project that can transform your living space while adding value to your home. With proper planning, the right materials, and careful execution, you can create a custom fireplace that looks professional and functions beautifully for years to come.
Whether you're looking to create a cozy living room focal point, add warmth to a bedroom retreat, or maximize space with a corner installation, the versatility of electric fireplaces makes them ideal for DIY enthusiasts of all skill levels.
By following this comprehensive guide, you'll be well-equipped to tackle your DIY electric fireplace project with confidence, creating a beautiful and functional addition to your home that you can enjoy for years to come.