Installing a Fireplace Insert: The Complete Guide
Transform your existing fireplace into an efficient heat source. Learn how to choose, install, and maintain a fireplace insert for gas, wood, or electric models — safely and confidently.
Start Your ProjectWhy Install a Fireplace Insert?
A fireplace insert is a self-contained appliance designed to fit into your existing masonry or prefabricated fireplace. It dramatically improves heating efficiency, reduces creosote buildup, and can lower energy bills. Whether you're looking to upgrade your home's heating or simply enjoy a more realistic fire with less maintenance, an insert is a smart investment.
Key Benefit: Traditional open fireplaces lose up to 90% of their heat through the chimney. A modern insert can achieve 70–80% efficiency, turning your fireplace into a reliable supplemental heat source.
Before choosing an insert, it's essential to understand the different types and their installation requirements. For a broader overview, see our guide on types of fireplaces explained.
Types of Fireplace Inserts
Your existing chimney and venting setup will largely determine which insert type is feasible. Here's a quick comparison:
| Type | Best For | Venting | Efficiency | Installation Complexity |
|---|---|---|---|---|
| Gas Insert | Convenience, consistent heat, remote control | Direct vent (horizontal or vertical) or B-vent | High (70–90%) | Moderate — requires gas line and venting |
| Wood Insert | Off-grid heating, traditional ambiance | Stainless steel chimney liner (6" typical) | High (60–80%) | High — liner, insulation, and clearances |
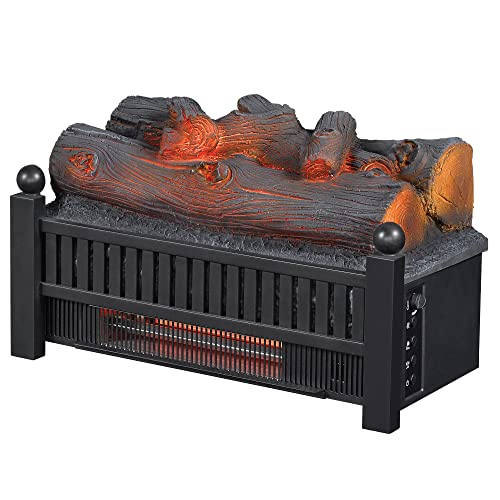
| Electric Insert | Apartments, no venting, easy DIY | None (plug-in) | Low to Moderate (zone heating) | Low — no venting or gas line |
| Pellet Insert | Efficient, eco-friendly, automated feeding | Vent through existing chimney or wall | Very High (75–90%) | Moderate to High — requires power and venting |
If you're considering a gas insert, review the gas fireplace insert with logs and blower options, or if wood is your preference, explore best wood burning fireplace insert with blower.
Pre-Installation Checklist
Before purchasing, verify these critical factors to ensure a smooth installation:
- Measure Your Fireplace Opening: Record width, height, and depth. Inserts are sized by these dimensions — too large won't fit, too small wastes space.
- Inspect the Chimney: A professional inspection is recommended. For wood inserts, a chimney cleaning and chimney inspection are often required before lining.
- Check Clearances: Combustible materials (mantel, trim) must meet the insert's clearance requirements. You may need a non-combustible surround.
- Confirm Fuel Availability: Gas inserts need a gas line; wood inserts need a supply of seasoned wood; electric inserts need a nearby outlet.
- Review Local Codes: Permits may be required. See fireplace permit requirements for details.
- Decide DIY vs Professional: Gas and wood inserts typically require a licensed installer. Electric inserts are often DIY-friendly. See DIY vs professional fireplace installation.
For a comprehensive planning resource, download our printable fireplace inspection checklist.
Installation Overview: What to Expect
While every installation is unique, here's the general process for a professional or DIY installation:
- Prepare the Fireplace: Remove existing doors, grates, and log sets. Clean the firebox thoroughly.
- Install Venting/Liner: For gas and wood inserts, a stainless steel liner or direct vent pipe is routed through the chimney. This is the most critical step. For electric, skip this.
- Run Utilities: Gas line connection for gas inserts; electrical outlet for electric or pellet inserts.
- Position the Insert: Slide the insert into the firebox. Level it and secure it according to the manufacturer's instructions.
- Connect Venting and Utilities: Attach the liner to the insert's flue collar. Connect gas or electrical lines.
- Install Surround and Trim: Attach the decorative surround to cover gaps between the insert and fireplace opening.
- Test and Inspect: Fire up the insert, check for leaks (gas) or smoke spillage (wood), and verify all safety features. Schedule a final inspection if required.
For a more detailed walkthrough, see our fireplace installation guide overview. If you're installing a wood stove insert, you may also find installing a wood burning stove in an existing fireplace helpful.
Venting and Safety Essentials
Proper venting is non-negotiable for gas and wood inserts. It ensures smoke and carbon monoxide exit your home safely.
- Gas Inserts: Direct vent systems pull air from outside and exhaust outside, eliminating indoor air quality concerns. Review gas fireplace venting requirements and gas fireplace ventilation requirements.
- Wood Inserts: A full stainless steel liner is required for most installations. Learn about stainless steel chimney liner for wood burning fireplace.
- Electric Inserts: No venting needed, but ensure proper clearance from combustibles and avoid overloaded circuits. See electric fireplace safety.
Safety First: Always install carbon monoxide detectors in rooms with gas, wood, or pellet inserts. For more, see signs of carbon monoxide from fireplace.
Cost and Efficiency Considerations
The overall investment varies by insert type, venting complexity, and whether you hire a professional. While we don't list specific prices here, you can expect:
- Entry-level electric inserts are the most budget-friendly and easiest to install.
- Mid-range gas inserts offer balanced convenience and efficiency; professional installation is recommended.
- Premium wood and pellet inserts provide the highest heat output but require professional lining and installation.
For a full cost breakdown, see how much does a fireplace cost and cost of gas fireplace insert and installation. To compare running costs, read gas vs electric fireplace running costs.
Energy efficiency is a major reason to upgrade. Learn about most energy-efficient fireplace types and fireplace energy saving tips.
Maintenance After Installation
Regular maintenance keeps your insert safe and efficient. Key tasks include:
- Cleaning fireplace glass regularly.
- Annual fireplace inspection by a professional.
- For wood inserts: ash removal and disposal and creosote buildup prevention.
- For gas inserts: cleaning the gas fireplace burner and checking for leaks.
- Follow a seasonal maintenance checklist.
See our full fireplace maintenance hub for detailed guides.
Frequently Asked Questions
Can I install a fireplace insert myself?
Electric inserts are often DIY-friendly. Gas and wood inserts typically require professional installation due to venting, gas lines, and safety codes. Always check local regulations. See is a fireplace DIY-friendly?
Do I need a chimney liner for a wood insert?
Yes, almost all wood inserts require a stainless steel chimney liner to safely exhaust smoke and creosote. Learn more in do you need a chimney or vent?
How long does installation take?
A professional gas or wood insert installation typically takes 4–8 hours. Electric inserts can be installed in 1–2 hours. See fireplace installation time.
Can a fireplace insert heat my whole house?
While a large wood or pellet insert can supplement a significant portion of your heating, it's rarely enough to replace a central HVAC system entirely. See can a fireplace heat an entire house?
What is the lifespan of a fireplace insert?
With proper maintenance, a quality insert can last 15–25 years or more. See fireplace lifespan.
For more questions, visit our fireplace FAQ hub.
Ready to Choose Your Insert?
Explore our recommended models below, carefully selected for performance, safety, and value. Whether you need a direct vent gas fireplace insert or a electric fireplace insert into existing fireplace, we've got you covered.
See Recommended Inserts