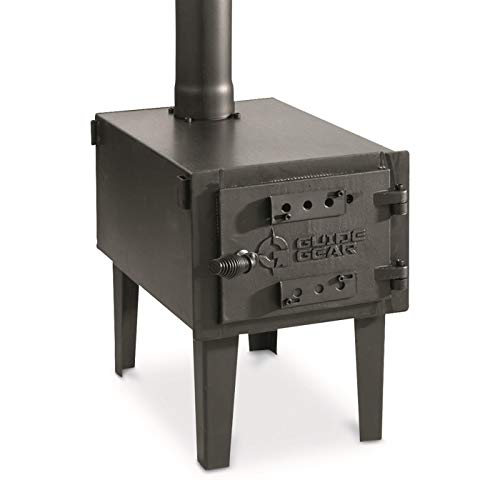
Installing a Wood Burning Stove Insert
A complete guide to transforming your inefficient open fireplace into a powerful, clean-burning heat source.
If you have an open masonry fireplace, you already know its charm. But you also know its dirty secret: it's terribly inefficient, often sending more heat up the chimney than it provides to your room. Installing a wood burning stove insert is the single most effective upgrade you can make. It converts your drafty fireplace into a sealed, high-efficiency heating appliance that can dramatically reduce your heating bills and slash wood consumption.
This guide will walk you through every critical aspect of the process, from initial planning and essential components to the step-by-step installation logic and safety considerations. By the end, you'll have a clear understanding of what the job entails and be ready to make informed decisions for your home.
Why Upgrade? A traditional open fireplace operates at about 10% efficiency. A modern wood burning insert can achieve 70% or higher, turning your fireplace into a genuine heating source. This guide helps you navigate the complexities of that upgrade.
What Exactly Is a Wood Burning Stove Insert?
A wood burning stove insert is essentially a wood stove designed to fit inside your existing fireplace opening. Unlike a freestanding stove that sits in the room, an insert is recessed into the firebox. It protrudes onto the hearth to radiate heat, but its body is contained within the masonry.
The key difference from an open fireplace is that the insert is a sealed unit. A glass door (often with an airwash system to keep it clean) closes off the fire. This allows you to precisely control the air intake, leading to a much more complete and efficient burn. This controlled combustion produces more heat and significantly less pollution and creosote.
The insert connects to a stainless steel chimney liner that runs the full height of your chimney. This liner is a non-negotiable component; it safely vents exhaust gases, protects your chimney from heat and creosote, and ensures proper draft. For a deeper understanding of the different fireplace types, you can read our guide on types of fireplaces.
Planning Your Installation: The Critical First Step
Proper planning prevents poor performance and ensures safety. Before you buy anything, you need to assess your current setup and understand the requirements.
1. Assess Your Existing Fireplace
Not all fireplaces are suitable for an insert. You need to check the following:
- Dimensions: Measure the width, height, and depth of your firebox opening. You need an insert that fits with the required clearances.
- Condition: The masonry firebox and chimney must be structurally sound. Any cracks in the firebox or damaged flue tiles must be repaired before installation. A professional inspection is highly recommended. See our guide on chimney inspection for what to expect.
- Chimney Type: Is it a masonry chimney or a prefabricated (zero-clearance) fireplace? Inserts are available for both, but the installation method differs. For prefab units, you'll need a specific wood stove insert for zero clearance fireplace.
2. Choose the Right Insert
Selecting an insert involves more than just size. Consider these factors:
- Heating Capacity: Insert sizes are rated by the square footage they can heat. Use our BTU and heating capacity guide to determine your needs.
- Efficiency: Look for EPA-certified inserts. Higher efficiency means less wood for more heat. Our article on most energy-efficient fireplace types can help you compare.
- Features: Do you want a blower to circulate heat? A catalytic combustor for lower emissions? Decide which features are important to you. A high-efficiency wood stove with blower is often a top choice.
- Style: Inserts come in various designs, from traditional cast iron to modern steel. Some are even designed to look like a traditional fireplace.
3. Gather Essential Components
Beyond the insert itself, you will need a complete installation kit. This typically includes:
- Chimney Liner: A stainless steel liner is mandatory. It must be the correct diameter for your insert's flue collar and insulated to maintain flue gas temperature and prevent creosote buildup. For a wood stove, you'll need a stainless steel chimney liner for wood stove.
- Insulation Blanket: Wraps around the liner to keep flue gases hot.
- Top Plate and Cap: Seals the top of the chimney and keeps rain and animals out.
- Appliance Connector: The pipe that connects the insert's flue collar to the liner.
- Hearth Pad/Extension: If your existing hearth is not large enough, you may need a hearth extension to meet clearance requirements. Our guide on fireplace hearth ideas can provide inspiration.
The Installation Process: Step-by-Step Logic
While we strongly recommend professional installation, understanding the process is valuable. It helps you communicate with your installer and appreciate the work involved. The process can be broken down into logical phases.
Phase 1: Preparation and Protection
The work area is prepped to protect your home. Floor coverings are laid down, and the fireplace opening is carefully measured and marked. The old damper is usually removed to allow the liner to pass through. The chimney is cleaned thoroughly to remove any existing creosote. This is a messy job, so containment is key.
Phase 2: Chimney Liner Installation
This is the most physically demanding part. A flexible stainless steel liner, often insulated, is pulled down the chimney from the roof. This can be a two-person job. The liner is connected to the insert's flue collar using an appliance connector. Ensuring a proper seal here is critical for draft and safety. For a deeper dive into the components, see our guide on double wall stainless steel stove pipe.
Phase 3: Insert Placement and Connection
The insert is carefully slid into the firebox. It must be positioned so that it sits level and the required clearances to combustibles are maintained. The appliance connector is then attached to the insert, and the liner is secured at the top with a top plate and cap. This seals the system.
Phase 4: Hearth and Clearance Verification
The hearth must be able to withstand the heat and protect the floor from embers. If the existing hearth is insufficient, a hearth pad is installed. The installer will meticulously check the clearances to any combustible materials like wood framing, mantels, or trim. This is a non-negotiable safety step. You can learn more about safety in our fireplace permit requirements guide.
Phase 5: Final Testing and Commissioning
Once installed, a small fire is lit to check for any smoke leaks and to ensure the draft is working correctly. The installer will demonstrate how to operate the air controls and the blower (if equipped). They will also explain the importance of burning seasoned wood and regular maintenance, such as periodic chimney cleaning.
Ready to explore high-efficiency inserts that will transform your fireplace?
View Recommended Wood Burning InsertsSafety First: Regulations, Clearances, and Insurance
Installing a wood burning stove insert is not a casual DIY project. It involves fire, toxic gases, and strict building codes. Failure to follow the rules can void your homeowner's insurance and, more importantly, put your family at risk.
- Building Codes: Your local building codes will dictate clearances, hearth requirements, and permitting. Always pull the necessary permits. Our article on fireplace permit requirements provides a general overview.
- Clearances: The manufacturer's manual for your specific insert is the ultimate authority on clearances. These are the minimum distances to combustible materials. Do not guess. Do not cut corners.
- Carbon Monoxide: A properly installed and maintained insert vents all combustion byproducts outside. However, it's wise to install carbon monoxide detectors on every level of your home. Learn more about the signs of carbon monoxide from a fireplace.
- Insurance: Contact your homeowner's insurance provider before installation. Many require a professional installation certificate. A DIY installation may not be covered.
For a comprehensive overview of safety, see our Fireplace FAQ. You should also understand the importance of a proper draft and how to prevent issues like smoke problems.
Maintenance: Ensuring Longevity and Efficiency
Your new insert will provide years of service with proper care. A little maintenance goes a long way.
- Ash Removal: Regularly remove ash to maintain airflow. Use a metal container and follow our guide on ash removal and disposal.
- Glass Cleaning: The airwash system keeps the glass relatively clean, but occasional cleaning is needed. Learn how to clean fireplace glass without damaging it.
- Annual Inspection: Have the chimney and insert inspected annually by a certified chimney sweep. They will check for creosote buildup, blockages, and any damage. This is also the time for a chimney cleaning if needed.
- Seasonal Prep: Before the heating season, follow a winter fireplace preparation routine. In the off-season, practice summer fireplace care.
Staying on top of maintenance is the key to a fireplace maintenance schedule that ensures safety and performance for years.
Frequently Asked Questions
- Can I install an insert in any fireplace? No, the fireplace must be structurally sound and large enough to accommodate the insert with proper clearances. A prefab fireplace needs a specific zero-clearance insert.
- How much does installation cost? Installation costs vary widely based on the liner, height, and complexity. It's a significant investment. For a general idea of costs, see our guide on fireplace cost breakdown.
- Do I need a blower? A blower is not strictly required, but it significantly improves heat distribution, especially in larger rooms or open-plan spaces. Many owners find a fireplace blower fan to be essential.
- How long does it take? A professional installation typically takes 1-2 days. If a complex liner is needed or repairs are required, it can take longer.
- Can I convert my wood burning insert later? It's complicated, but possible. For example, some people look into converting a wood burning fireplace to electric for convenience, but this changes the entire setup. The best time to decide on your fuel source is before you buy.
Conclusion: A Smart Investment in Comfort
Installing a wood burning stove insert is a significant but rewarding project. It transforms a decorative fireplace into a functional heating appliance that can pay for itself over time through reduced energy bills. The key to a successful outcome is thorough planning, a focus on safety, and using high-quality components installed by a professional. By understanding the process and requirements, you can confidently embark on this upgrade, looking forward to cozy, efficient warmth for many years to come.
Whether you're just starting your research or ready to buy, we're here to help you make the right choices for your home. Explore our recommended products below to find the perfect insert for your needs.