Installing a Chimney for a Wood Stove
Your complete resource for understanding and executing a safe, efficient chimney installation for your wood stove. From planning to final inspection, we cover it all.
START EXPLORINGKey Insight: A properly installed chimney is the most critical component of your wood stove system. It ensures safety, efficiency, and long-term performance. This guide covers everything from choosing the right materials to understanding building codes.
Why Proper Chimney Installation Matters
Installing a chimney for a wood stove is more than just running a pipe through your roof. It's about creating a safe and efficient system that will serve you for decades. A poorly installed chimney can lead to poor draft, dangerous creosote buildup, and even house fires. That's why understanding the entire process—from selecting the right components to following local building codes—is essential for every homeowner.
Before you begin, it's important to assess your home's structure and existing setup. Whether you're installing a new stove or replacing an old chimney, the principles remain the same. For a broader overview of different fireplace types, you might find our guide on types of fireplaces helpful.
Key Components of a Wood Stove Chimney
A complete chimney system for a wood stove consists of several critical parts. Understanding each one will help you make informed decisions during your installation.
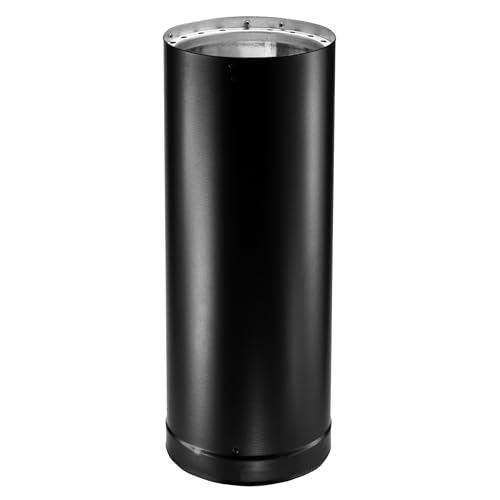
- Chimney Pipe: This is the main conduit for smoke and gases. It can be made of stainless steel, black steel, or double-walled insulated pipe. The choice depends on your stove's requirements and the distance to combustible materials.
- Chimney Liner: Often used when installing a wood stove into an existing masonry chimney. A stainless steel liner is the most common and reliable option. It protects the masonry and improves draft. For more details, see our article on stainless steel chimney liners.
- Through-the-Wall Components: If your stove vents horizontally, you'll need a wall thimble and a tee, along with an exterior chimney chase.
- Roof Penetration: The part of the chimney that goes through the roof requires a flashing kit and a storm collar to prevent water leaks.
- Chimney Cap: Installed at the top of the chimney to keep out rain, debris, and animals.
Types of Chimney Installations
There are two primary methods for installing a chimney for a wood stove, each with its own set of considerations.
1. Interior Chimney (Through the Roof)
This is the most common and often the most efficient setup. An interior chimney stays within the home's thermal envelope, which helps maintain a strong draft. The installation involves running the chimney pipe through the ceiling, attic, and roof. It requires careful planning to avoid obstructions like joists and rafters.
2. Exterior Chimney (Through the Wall)
An exterior chimney runs along the outside of the house. This setup is simpler to install in some cases because it doesn't require penetrating the roof. However, it can be less efficient because the exposed chimney cools down, which can affect draft. It also requires a sturdy support structure.
Choosing the right method often depends on your home's layout and personal preference. For a more in-depth comparison of installation options, you can read our guide on wall-mounted vs. insert vs. freestanding fireplaces.
Investment Overview for Installing a Chimney for a Wood Stove
The investment level for installing a chimney for a wood stove can vary widely based on the type of installation, materials, and labor. Here are typical tiers for common scenarios:
- Full Chimney Kit (Interior): mid-range for a quality double-walled stainless steel kit that includes all components.
- Chimney Liner Installation: mid-range to install a flexible or rigid stainless steel liner into an existing masonry chimney.
- Class A Chimney Pipe: mid-range per section for premium insulated pipe.
- Professional Installation: mid-range to premium for a complete new installation, including labor and all materials.
These are general tier estimates. For a more accurate assessment, consider your home's specific requirements. Many homeowners opt for professional installation to ensure safety and code compliance. You can also learn about the investment for installing a fireplace insert for a related perspective.
Step-by-Step Installation Overview
While the specifics will vary, the following steps provide a general roadmap for installing a chimney for a wood stove.
- Planning and Permits: Check local building codes and obtain necessary permits. Ensure you have a fire-safe floor protector and maintain proper clearances.
- Positioning the Stove: Place your wood stove in the desired location, respecting all clearances to combustible walls and furniture.
- Installing the Stove Pipe: Connect the stove pipe (single-wall or double-wall) to the stove's flue collar. Use a stove pipe adapter if needed.
- Mounting the Ceiling Support: If going through the roof, install the ceiling support box, which holds the chimney pipe in place.
- Assembling the Chimney Pipe: Connect Class A chimney pipe sections from the support box up through the attic and out the roof.
- Installing the Roof Flashing: Secure the roof flashing around the chimney pipe to create a watertight seal.
- Adding the Storm Collar and Chimney Cap: The storm collar wraps around the pipe to prevent water from seeping in. The cap goes on top to keep out debris.
- Final Inspection: Have the entire system inspected by a certified professional to ensure it meets all safety standards.
For more detailed instructions on the entire fireplace installation process, check out our comprehensive fireplace installation guide.
Common Mistakes to Avoid
Even experienced DIYers can make mistakes. Here are some common pitfalls to avoid during your chimney installation.
- Incorrect Sizing: Using a chimney pipe that is too small or too large for your stove can cause draft problems. Always match the pipe size to your stove's flue collar.
- Inadequate Clearances: Failing to maintain proper distance from combustible materials (walls, ceilings, rafters) is a leading cause of house fires. Double-check manufacturer guidelines and local codes.
- Poorly Sealed Connections: Leaky joints can allow smoke and carbon monoxide to enter your home. Use high-temperature sealant where appropriate and ensure all connections are tight.
- Ignoring the Chimney Liner: In an existing masonry chimney, a stainless steel liner is not just an accessory—it's a necessity for safety and efficiency. It prevents flue gases from seeping into the masonry.
- Not Installing a Chimney Cap: Without a cap, rain and moisture can damage the chimney and cause rust, while animals can build nests that block the flue.
If you encounter any issues during or after installation, our fireplace troubleshooting guide may help you identify and fix common problems.
Venting Requirements and Codes
Understanding venting requirements is non-negotiable. Your chimney must be correctly sized and installed according to local building codes, which often follow the standards set by the International Code Council (ICC).
Key venting rules include:
- Height: The chimney must be at least 3 feet above the roof surface and at least 2 feet higher than any part of the roof within 10 feet. This is known as the 3-2-10 rule.
- Clearance: A minimum of 2 inches between the chimney pipe and any combustible material (for Class A pipe). This clearance is often increased to 36 inches for single-wall stove pipe.
- Support: The chimney must be adequately supported with wall brackets and roof supports.
For a better understanding of your home's overall ventilation needs, you can read our article on fireplace ventilation requirements.
Maintenance After Installation
Once your chimney is installed, regular maintenance is key to safe and efficient operation.
- Annual Inspection: Have your chimney inspected and cleaned by a professional at least once a year, or more often if you use your stove heavily.
- Creosote Removal: Creosote is a flammable byproduct of wood burning that builds up in the chimney. Regular cleaning removes this fire hazard.
- Check the Cap: Ensure the chimney cap is intact and free from debris.
For a more detailed maintenance schedule, see our fireplace maintenance schedule.
Is a Professional Installation Worth It?
While a skilled DIYer can install a chimney, it's a complex and high-stakes project. A professional installation offers several advantages:
- Code Compliance: Professionals know local building codes and will ensure your installation passes inspection.
- Warranty: Many chimney and stove manufacturers require professional installation to validate their warranty.
- Peace of Mind: You can be confident that the installation is safe, reducing the risk of fire or carbon monoxide poisoning.
Considering the high stakes of an installation error, hiring a professional is often the most prudent choice. You can learn more about the DIY vs. professional installation debate.