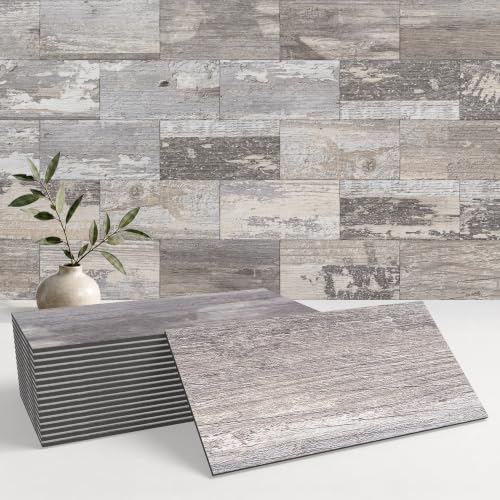
DIY Tile Fireplace: A Complete Guide to Transforming Your Hearth
Discover how to give your fireplace a stunning makeover with tile. From choosing the right materials to mastering the installation, this guide covers everything you need to know for a professional-looking finish.
Start Your ProjectA fireplace is often the focal point of a living room, and updating its surround with tile is one of the most impactful DIY projects you can undertake. Whether you're modernizing an outdated brick hearth or adding a decorative touch to a new build, a DIY tile fireplace project can dramatically enhance your home's aesthetic. This guide will walk you through the process, from selecting the perfect tile to applying the final grout, ensuring a beautiful and durable result.
Why Tile? Tile offers incredible versatility in design, is heat-resistant when chosen correctly, and is easy to clean. It's a practical and stylish choice for any fireplace surround, whether you're aiming for a mid-century modern look or a vintage feel.
1. Planning Your DIY Tile Fireplace Project
Before you pick up a trowel, careful planning is essential. This phase determines the success of your project, from the overall look to the safety and longevity of the installation.
Choosing the Right Tile
The tile you choose will define the style of your fireplace. However, not all tiles are suitable for the heat of a fireplace. You'll need to select materials that are non-combustible and can withstand thermal expansion and contraction. Popular options include ceramic, porcelain, natural stone (like marble, slate, or travertine), and glass. For a truly unique look, you might consider a heat-resistant grout to match. For more inspiration, explore our DIY fireplace tile ideas.
Design and Layout
Decide on the area you want to tile. Will it be just the surround, or will you extend it to a hearth? Consider the shape and size of your tiles. A herringbone pattern can add a modern touch, while a classic subway tile offers timeless appeal. If you have a non-combustible surround, you have more flexibility. For a sleek, contemporary look, you might also explore marble electric fireplace TV stand options that incorporate tile-like finishes.
Tools and Materials
Gather all necessary tools before starting. You will need:
- Tile of your choice
- Thin-set mortar (heat-resistant)
- Notched trowel
- Tile spacers
- Tile cutter or wet saw
- Grout (heat-resistant)
- Grout float
- Sponge and bucket
- Safety gear (gloves, goggles, mask)
- Level
- Measuring tape
2. Step-by-Step Guide to Tiling Your Fireplace
With your plan in place, it's time to begin the transformation. Follow these steps for a flawless finish.
Step 1: Preparation and Surface Cleaning
Ensure the surface you are tiling is clean, dry, and flat. If you are tiling over brick, you may need to apply a skim coat of mortar to create a smooth surface. Remove any existing tile, adhesive, or debris. For a successful bond, the surface must be free of dust and grease.
Step 2: Dry Layout
Before mixing any mortar, lay out your tiles on the floor or directly on the fireplace surround to plan your pattern. This helps you visualize the final look and determine any cuts you'll need to make. If you have a electric fireplace insert, ensure the tile layout works with its frame.
Step 3: Applying Thin-Set Mortar
Mix your thin-set mortar according to the manufacturer's instructions. Using a notched trowel, apply a layer of mortar to a small section of the fireplace. Hold the trowel at a 45-degree angle and comb the mortar to create ridges. This ensures even coverage and a strong bond.
Step 4: Setting the Tile
Press each tile firmly into the mortar with a slight twisting motion. Use tile spacers to ensure consistent gaps between tiles. Work in small sections so the mortar doesn't dry before you place the tiles. Check for levelness as you go. If you are tiling around a gas fireplace insert, make sure to maintain the required clearances.
Step 5: Cutting Tiles
For edges and corners, you will need to cut tiles. Use a manual tile cutter for straight cuts or a wet saw for more complex shapes or hard materials like porcelain. Always measure twice and cut once, and wear safety glasses.
Step 6: Grouting
After the mortar has fully cured (usually 24-48 hours), remove the spacers. Mix your grout and apply it using a grout float. Work it into the joints at a 45-degree angle, then scrape off the excess. Allow it to set for the recommended time, then wipe the surface with a damp sponge to clean the tiles and smooth the grout lines.
Step 7: Sealing (Optional)
For natural stone tiles, applying a sealer is crucial to protect against stains. For ceramic or porcelain, sealing the grout is often recommended. This step adds durability and makes future cleaning easier. Proper maintenance is key, and you can learn more in our fireplace maintenance guide.
3. Design Ideas for Your Tiled Fireplace
The tile you choose can completely change the character of your space. Here are some popular styles to consider:
- Subway Tile: A classic choice that works in both traditional and modern settings. Try a dark grout for a bold look.
- Mosaic Tiles: Perfect for adding intricate patterns and a splash of color. They are often used on the surround or hearth.
- Large Format Tiles: Create a seamless, contemporary look with minimal grout lines. This is an excellent choice for a DIY white fireplace.
- Stone Tiles: Add natural texture and warmth with slate, travertine, or marble. This pairs beautifully with a DIY faux fireplace.
For more inspiration on updating your hearth, explore our guide on fireplace updates before and after.
4. Safety and Maintenance Tips
Working with tile and mortar requires attention to safety. Always wear protective gear. When your project is complete, proper maintenance will keep it looking new for years.
- Ensure the tile and grout you choose are rated for high temperatures.
- Always maintain the required clearance between the fireplace opening and combustible materials.
- Clean your tiled fireplace with a pH-neutral cleaner and a soft cloth. For tougher stains, refer to our guide on how to clean fireplace glass and clean fireplace brick & stone.
- Inspect the grout and caulk annually for cracks and repair as needed to prevent moisture damage. Our annual fireplace inspection guide can help.
Frequently Asked Questions (FAQ)
Can I tile directly over a brick fireplace?
Yes, you can, but preparation is key. The brick surface must be clean, level, and free of loose material. You will likely need to apply a skim coat of mortar to create a flat surface for the tile to adhere to properly.
What type of tile is best for a fireplace surround?
Porcelain, ceramic, and natural stone tiles are all excellent choices. The most important factor is that the tile is non-combustible and rated for heat exposure. Always check the manufacturer's specifications.
Is a DIY tile fireplace project difficult for a beginner?
With careful planning and patience, tiling a fireplace is a manageable DIY project. The most challenging parts are often making accurate cuts and ensuring a level surface. Our guide on DIY fireplace feasibility can help you assess your readiness.
How long does it take to tile a fireplace?
The tiling itself can often be completed over a weekend. However, you must account for curing time for the mortar and grout, which can add a few days to the project. For a more detailed breakdown, see our fireplace installation time guide.