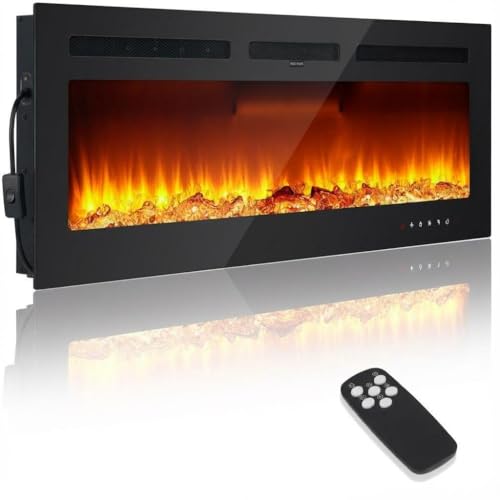
Built In Cabinets Around Fireplace DIY
Transform your living space with custom built-in cabinets and shelving around your fireplace. This comprehensive DIY guide walks you through design planning, material selection, construction, and finishing — no professional contractor required.
Explore the GuidePlanning Your Built-In Cabinet Project
Before you pick up a single tool, careful planning is essential. A successful built-in project starts with accurate measurements and a clear vision. Begin by measuring the wall space on both sides of your fireplace, including the height from floor to ceiling, the width of each side, and the depth of your fireplace surround. Account for any existing trim, mantels, or hearth extensions that may affect your layout.
Consider the primary function of your cabinets. Will they store media equipment, display books, or hide clutter? If you're integrating a TV, plan for cable management and ventilation. For a cohesive look, explore built-in cabinets and shelves around fireplace designs that balance open shelving with closed storage. You may also want to review building built-in cabinets next to fireplace techniques for structural tips.
Think about symmetry and proportion. Cabinets that are too shallow won't hold larger items, while overly deep cabinets can overwhelm a room. A depth of 12 to 16 inches is typically ideal for most living spaces. If your fireplace is part of a larger fireplace wall unit and entertainment center setup, ensure your new cabinets complement the existing style.
Materials and Tools You'll Need
Choosing the right materials balances durability, aesthetics, and ease of workability. For the cabinet frame, 3/4-inch plywood is the standard choice — it's strong, stable, and takes paint or stain well. For shelves, you can use plywood or solid wood depending on your desired look and load-bearing needs. MDF is another option for painted cabinets, offering a smooth finish at a budget-friendly tier.
Here is a breakdown of common materials and their relative quality tiers:
| Material | Best For | Quality Tier |
|---|---|---|
| 3/4" Plywood (Birch or Maple) | Cabinet frames, shelves, structural components | Mid-range to Premium |
| MDF (Medium-Density Fiberboard) | Painted cabinet doors, face frames, trim | Entry-level to Mid-range |
| Solid Hardwood (Oak, Poplar, Maple) | Face frames, doors, visible trim, staining | Premium to Luxury |
| Particle Board | Budget projects, hidden structural panels | Entry-level |
| Plywood with Veneer | Stained finishes requiring grain consistency | Mid-range to Premium |
Essential tools include a circular saw or table saw, drill/driver, jigsaw, level, measuring tape, stud finder, and a nail gun or hammer and finishing nails. For a professional finish, a router with a roundover bit and an orbital sander are invaluable. Don't forget safety gear: safety glasses, ear protection, and a dust mask.
If you're planning to incorporate an electric fireplace into your built-ins, review DIY fireplace surround for electric fireplace for specific framing and ventilation considerations. For a more comprehensive look at integrating storage and media, see DIY built-in entertainment center with fireplace.
Step-by-Step Construction Process
Building built-in cabinets around a fireplace is a manageable DIY project when broken into clear phases. The following steps outline the process from framing to finishing.
Frame the Base
Build a sturdy base frame using 2x4 lumber, ensuring it is level and securely anchored to the floor and wall studs. This base supports the entire cabinet structure.
Construct Cabinet Boxes
Assemble the cabinet boxes using 3/4-inch plywood, cutting side panels, bottoms, and tops. Secure with wood glue and screws, checking for square at every stage.
Install Shelving
Add adjustable or fixed shelves using shelf pins or cleats. For heavy items, use 3/4-inch plywood or solid wood to prevent sagging over time.
Attach Face Frames
Build and attach face frames to the front of each cabinet box. This provides a clean, finished look and serves as the mounting surface for doors and trim.
Add Trim & Molding
Install crown molding at the top, baseboard at the bottom, and any decorative trim to tie the cabinets into the room's architecture.
Finish & Paint
Fill nail holes, sand smooth, and apply primer and paint or stain. A high-quality finish transforms the project from DIY to custom-built.
For a more detailed walkthrough of specific configurations, refer to built-in entertainment center with fireplace designs and custom built-in entertainment center with fireplace. If your project includes a media component, built-in entertainment center with electric fireplace offers specialized guidance.
Design Considerations for Built-Ins
The visual success of your built-in cabinets depends on how well they integrate with your fireplace and room decor. Consider the following design elements:
- Symmetry: Matching cabinets on both sides of the fireplace create a balanced, formal look. Asymmetrical designs work well for modern or eclectic spaces.
- Open vs. Closed Storage: A mix of open shelving and closed cabinets offers display space and hidden storage. Open shelves can make a room feel larger, while closed cabinets reduce visual clutter.
- Color and Finish: White or light-painted cabinets brighten a room and blend with various styles. Stained wood adds warmth and complements fireplace with bookshelves on each side ideas.
- Lighting: Integrated LED strip lighting or puck lights inside shelves adds ambiance and functionality. Consider a smart Wi-Fi fireplace controller for modern convenience.
- Fireplace Integration: Ensure your cabinets don't interfere with your fireplace's clearance requirements. Review TV above fireplace safety if mounting a TV above the firebox.
For inspiration on layouts, explore fireplace with floating shelves on both sides and living room fireplace with built-ins on each side. If you're working with a smaller space, design ideas for small living room with fireplace provides space-saving solutions.
Common Challenges and Solutions
DIY built-ins rarely go perfectly on the first try. Here are common issues and how to address them:
- Uneven Walls and Floors: Older homes often have uneven surfaces. Use shims to level your base frame and scribe filler strips to fit against wavy walls.
- Electrical Outlets: Plan for outlets inside cabinets for media equipment. If you're not comfortable with electrical work, consult a licensed electrician. For fireplace-related electrical considerations, see can you use a gas fireplace without electricity.
- Ventilation: If housing electronics, ensure adequate airflow. Review fireplace ventilation requirements for guidance.
- Weight Distribution: Built-ins can be heavy. Ensure your base is properly supported and anchored to wall studs.
- Matching Existing Trim: If your home has existing trim, match the profile and paint color for a seamless look.
If your project involves adding a fireplace where none existed, adding a fireplace to an existing home covers the broader considerations. For safety and clearance, always refer to furniture distance from fireplace guidelines.
Finishing Touches and Styling
Once construction is complete, the finishing details elevate your built-ins from functional to beautiful. Fill all nail holes with wood filler, sand smooth, and apply a high-quality primer. For painted cabinets, a satin or semi-gloss finish is durable and easy to clean. For stained wood, apply a wood conditioner before staining to ensure even color absorption, followed by a protective topcoat.
Styling your built-ins is the fun part. Mix books, decorative objects, and framed photos. Add battery-operated candles for fireplace or artificial flower arrangements for fireplaces for seasonal flair. If you have an electric fireplace, consider electric fireplace logs with heat and remote control for added realism.
For holiday decorating, DIY fireplace Christmas ideas can help you make the most of your new built-ins. And if you're considering a full room refresh, DIY fireplace makeover and DIY white fireplace provide additional inspiration.
Custom Built-Ins vs. Prefabricated Cabinets
Custom DIY Built-Ins
Fully tailored to your space, allowing for exact dimensions and seamless integration with your fireplace. Typically requires more time and woodworking skill but offers superior aesthetic results and higher home value. Material costs vary by tier, with mid-range to premium plywood and hardwood being common choices.
Prefabricated Cabinets
Faster to install and often more budget-friendly at the entry-level tier. However, standard sizes may leave gaps or require filler pieces. Quality ranges from entry-level particle board to premium solid wood. Best for renters or those with limited tools and time.
Frequently Asked Questions
For a typical living room fireplace with cabinets on both sides, expect a weekend to a full week for construction, depending on your experience and the complexity of the design. Finishing (painting or staining) adds another day or two. Having a clear plan and pre-cut materials can significantly speed up the process.
In most cases, non-structural built-in cabinets do not require a permit. However, if you are modifying the fireplace itself, adding electrical circuits, or making structural changes, check with your local building department. Review fireplace permit requirements for more details.
3/4-inch plywood is the most popular choice for the cabinet boxes due to its strength and stability. For face frames and doors, solid wood or MDF are common. The best material depends on your finish (paint vs. stain) and your quality tier target. Mid-range to premium projects often use birch or maple plywood with solid wood face frames.
Yes, but heat management is critical. Ensure your TV is mounted at a safe distance from the firebox and consider a heat deflector or mantel. Review TV above fireplace safety for detailed guidelines. Built-ins can incorporate cable management and ventilation for media equipment.
Plan for cable management during the design phase. Install grommets or cut openings in shelves and cabinet backs to route cables. Use cable ties and raceways to keep things organized. If you're integrating an electric fireplace, electric fireplace insert without heat can be a simpler option for ambiance-only setups.
Ready to Build Your Dream Built-Ins?
You now have the knowledge to plan, build, and finish custom cabinets around your fireplace. Explore our recommended products below to find the right fireplace insert, tools, and accessories for your project.
View Recommended Products