Refacing Your Brick Fireplace with Stone
Transform your outdated brick fireplace into a stunning focal point. This comprehensive guide covers everything you need to know about refacing with stone, from planning and material selection to installation and aftercare.
Is your brick fireplace looking dated, tired, or simply not matching your home's evolving style? You're not alone. Many homeowners are discovering that a full demolition and rebuild isn't necessary to achieve a dramatic upgrade. Refacing your brick fireplace with stone is a highly effective, cost-conscious way to completely transform the look and feel of your living space without the mess and expense of a major structural renovation.
This process, also known as applying a stone veneer, allows you to cover the existing brick with a thin, lightweight layer of natural or manufactured stone. The result is the timeless beauty and texture of a stone fireplace with a fraction of the weight and cost. This guide will walk you through the entire journey, helping you make informed decisions and preparing you for a successful project. For those new to fireplace renovations, understanding the basics can be helpful, so you may want to start with our beginner's guide to fireplaces.
Why Reface a Brick Fireplace with Stone?
Before diving into the "how," it's important to understand the "why." Refacing offers a unique set of advantages that make it a compelling choice for any home improvement enthusiast.
- Aesthetic Transformation: This is the primary motivation. Stone offers a depth, texture, and natural elegance that painted brick or other finishes struggle to match. It can shift your fireplace from a builder-grade afterthought to a custom-designed centerpiece. You can explore various living room stone fireplace decor ideas to see the potential.
- Increased Home Value: A well-executed stone fireplace is a desirable feature that can significantly boost your home's appeal to potential buyers. It's often perceived as a premium upgrade, adding a touch of luxury.
- Cost-Effective: Compared to a full tear-down and rebuild, refacing is substantially more affordable. The savings come from not having to rebuild the firebox, chimney, and structural framework. For a broader perspective, you can review our fireplace cost breakdown.
- Less Mess and Faster: A full renovation is a major construction project. Refacing is a more contained job. There's less demolition debris, and the project can often be completed in a few days to a week, minimizing disruption to your daily life.
- Improved Insulation: A layer of stone veneer can add a small amount of thermal mass and insulation to the existing structure, though its primary benefit is aesthetic.
While refacing is a fantastic option, it's not for every situation. It's important to consider the pros and cons of different fireplace types. If you're weighing your options, our article on fireplace pros and cons by type can provide valuable context.
Choosing the Right Stone for Your Fireplace
The stone you choose will define the entire character of your finished fireplace. The two main categories are natural stone and manufactured stone veneer.
1. Natural Stone Veneer
This is real stone that has been cut thin (typically 1 to 2 inches thick) to reduce its weight. It offers unparalleled authenticity and unique variations in color and texture.
- Types: Popular choices include limestone, travertine, slate, granite, and sandstone.
- Pros: Genuine, timeless, each piece is unique, adds significant value.
- Cons: Higher cost (typically in the premium to luxury tier), can be heavier, requires more skill to install due to irregular shapes, and may need sealing.
2. Manufactured Stone Veneer (MSV)
Also known as "cast stone" or "faux stone," this is a lightweight concrete product molded from real stone and colored with pigments. It's the most popular choice for refacing projects.
- Pros: More affordable (typically in the mid-range to premium tier), consistent in size and shape for easier installation, much lighter than natural stone, and available in a vast array of styles and colors.
- Cons: Can look repetitive if not installed carefully, less "authentic" than natural stone, and may fade or chip over time.
Choosing a Tier:
When selecting your material, think in terms of entry-level, mid-range, and premium options. Entry-level manufactured stone offers a great budget-friendly look. Mid-range options provide a better balance of realism and durability. Premium and luxury natural stones are an investment in authenticity and timeless beauty. A mid-range manufactured stone often provides the best balance of cost, realism, and ease of installation for a DIY enthusiast.
Tools and Materials You'll Need
Before you start, gather all the necessary tools and materials. Having everything on hand will make the project go much smoother. This is a general list; your specific project may require variations.
Safety Gear
- Safety glasses
- N95 dust mask or respirator
- Heavy-duty work gloves
- Ear protection
Tools
- Angle grinder with a diamond blade (for cutting stone)
- Mason's trowel
- Notched trowel
- Mortar hawk
- Level (4-foot and 2-foot)
- Measuring tape
- Chalk line
- Wire brush
- Hammer and chisel
- Mortar mixing paddle and drill
- Buckets
- Grout bag (optional)
- Pointing trowel
- Stiff-bristle brush
Materials
- Stone Veneer: Enough to cover your square footage, plus 10-15% for waste and cuts.
- Mortar Mix: Use a type specifically designed for stone veneer (Type S or N).
- Metal Lath: For surfaces that aren't porous (if you're not applying directly to brick). Since you're going over brick, you may be able to apply directly, but check local codes.
- Scratch Coat: A base coat of mortar to create a rough surface for the stone to adhere to (essential if using lath).
- Water: For mixing mortar and cleaning.
- Sealer: A breathable masonry sealer to protect the stone (especially for natural stone and outdoor applications).
Step-by-Step Guide to Refacing Your Fireplace
This is a general overview. Always follow the specific instructions provided by your stone and mortar manufacturers.
Step 1: Preparation and Surface Cleaning
This is the most critical step for a durable finish. The stone needs a clean, rough surface to bond to.
- Clear the Area: Remove all furniture, decor, and floor coverings from the work area. Protect the floor with drop cloths.
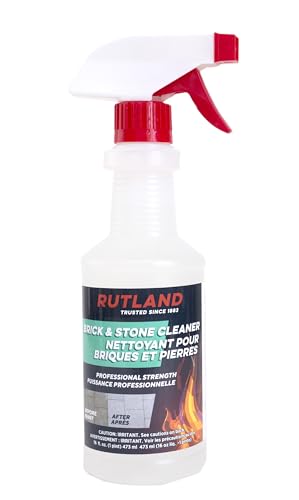
- Clean the Brick: Use a wire brush to remove any loose mortar, dirt, soot, or efflorescence. For heavy soot, you may need a specialized cleaner. A clean surface is non-negotiable. Our guide on how to clean fireplace brick and stone provides detailed methods.
- Create a Rough Surface: Brick can be very smooth. To ensure good adhesion, you must create a "scratch coat." You can do this by applying a thin layer of mortar mixed with a bonding agent, or by attaching metal lath to the brick and then applying a scratch coat over it. For most brick fireplaces, applying a scratch coat directly is sufficient if the brick is clean and porous. Consult your mortar manufacturer's recommendations.
- Plan Your Layout: Before mixing any mortar, dry-fit your stone. This allows you to plan the pattern, make cuts, and ensure you have enough material. Start from the bottom and work your way up, mixing different sizes and shapes for a natural look.
Step 2: Applying the Scratch Coat
If required, use a trowel to apply a 1/4 to 1/2 inch thick layer of mortar over the entire surface. Use a notched trowel to create horizontal grooves. This "scratch coat" provides a mechanical key for the next layer of mortar to grab onto. Let it cure according to the manufacturer's instructions, typically for 24 hours, until it's hard but still slightly rough.
Step 3: Installing the Stone Veneer
This is the main event. Work in small sections to prevent the mortar from drying out before you can place the stone.
- Mix Mortar: Mix a batch of mortar according to the package directions. It should be a peanut butter-like consistency.
- Apply Mortar: Using your trowel, apply a 1/2-inch thick layer of mortar to the back of the stone. For larger stones, you can also "butter" the back and apply a thin layer to the wall (back-buttering).
- Press and Wiggle: Firmly press the stone onto the scratch coat. Wiggle it slightly to ensure good contact and to squeeze out excess mortar. The mortar should be able to support the stone without it sliding down.
- Maintain a Consistent Joint: Use spacers or your fingers to maintain a consistent joint width (typically 3/8 to 1/2 inch).
- Check for Level: Periodically check that your stones are level and plumb. Use shims to adjust if needed.
- Cutting Stone: When you need to cut a stone, use your angle grinder with a diamond blade. Always wear your safety glasses and dust mask. You can also use a hammer and chisel for a more rustic, broken edge.
If you're ever unsure about the process, comparing it to DIY fireplace tile installation can help, as many principles of adhesion and layout are similar.
Step 4: Grouting and Finishing
Once the mortar has set (usually after 24-48 hours), you can grout the joints.
- Mix Grout: Prepare a batch of grout to a consistency that can be easily applied with a grout bag or pointing trowel.
- Apply Grout: Fill the joints between the stones. You can use a grout bag for precision or a pointing trowel.
- Tool the Joints: Once the grout has begun to set (it will lose its sheen), use a pointing trowel or a wooden stick to smooth and shape the joints. This is called "tooling."
- Clean the Stone: As you go, use a stiff-bristle brush to remove any excess grout from the face of the stone before it hardens.
- Final Cleaning and Sealing: After the grout has fully cured (check manufacturer's instructions, usually 72 hours), clean the entire surface with a damp sponge. Once dry, apply a breathable masonry sealer to protect the stone from stains and moisture. This is especially important for natural stone.
Design Ideas and Inspiration
The beauty of refacing is the incredible range of design possibilities. Here are a few popular styles to consider:
- Rustic and Natural: Use irregular, rough-hewn stones in earth tones like tan, brown, and gray. This style pairs beautifully with wood beams and a rustic mantel decor.
- Modern and Clean: Opt for large, rectangular stones in a stacked or ashlar pattern. Choose cool colors like gray, charcoal, or white for a sleek, contemporary look. A contemporary mantel decor can complete the look.
- Farmhouse: A popular choice is a mix of white and gray stones in a random ashlar pattern. This creates a bright, airy feel. You can see how this style works with our farmhouse mantel decorating ideas.
- Full Overlay vs. Accent: You can reface the entire brick structure, including the hearth, or just the upper portion, leaving the hearth brick for contrast.
For more inspiration on how to style your finished masterpiece, explore our general stone fireplace mantel decorating ideas.
Maintenance and Aftercare
Once your new stone fireplace is complete, it's relatively low-maintenance. Regular dusting with a soft brush or vacuuming with a brush attachment will keep it looking its best. For deeper cleaning, use a mild stone cleaner and a soft cloth. Avoid acidic or abrasive cleaners, which can damage the stone and grout. As part of your annual home maintenance, include your fireplace in your annual fireplace inspection to ensure everything remains in top condition.
Conclusion: A Worthwhile Investment
Refacing your brick fireplace with stone is a rewarding project that can dramatically enhance the beauty, value, and enjoyment of your home. While it requires careful planning and some elbow grease, the transformation is well worth the effort. By choosing the right materials and following the proper steps, you can create a stunning, durable centerpiece that you'll love for years to come. Before you begin, it's always wise to review a comprehensive fireplace buying guide to ensure you've considered all your options.