Why Framing Matters for Electric Fireplace Inserts
An electric fireplace insert is designed to be recessed into a wall or cabinet, and the frame you build around it determines whether the final result looks like a professionally built-in feature or an obvious afterthought. Proper framing does three critical things: it supports the weight of the insert, it maintains the manufacturer's required clearances for safety, and it creates a clean surface for finishing materials like drywall, tile, or shiplap.
Because electric inserts produce heat through a fan-forced or infrared mechanism rather than combustion, they don't require a chimney, gas line, or complex venting. This simplicity is exactly why so many homeowners choose to build a DIY electric fireplace rather than hire a contractor. However, the framing still needs to be accurate — a frame that's too tight can block airflow, while one that's too loose will leave unsightly gaps around the insert.
If you're still deciding between an electric insert and other options, our guide on the differences between electric, gas, and wood fireplaces can help you confirm that electric is the right fuel type for your space.
Types of Electric Fireplace Inserts and Their Framing Needs
Not all electric inserts are framed the same way. Understanding which category your unit falls into will determine the entire approach to your build.
1. Zero-Clearance Electric Inserts
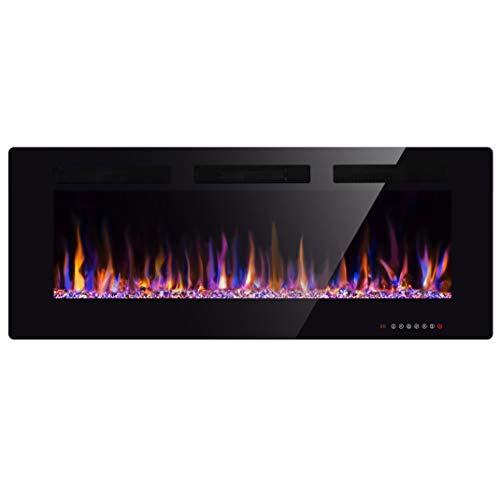
Most modern electric inserts are classified as zero-clearance, meaning they can be framed directly against combustible materials like wood studs and drywall. These units have their heating components and electronics isolated from the outer shell, so the exterior stays cool enough to touch. This is the easiest type to frame and the most common for DIY installations.
2. Built-In vs. Insert-Style Units
A true "insert" is designed to slide into an existing masonry or prefabricated fireplace opening. A "built-in" electric fireplace is designed to be framed into a new wall from scratch. The framing approach differs: inserts often need a custom surround to cover the gap between the old opening and the new unit, while built-ins are framed directly to the manufacturer's rough-in spec.
If you're working with an existing fireplace, our guide on installing an electric fireplace into an existing fireplace walks through the conversion process in detail.
3. Wall-Mounted and Recessed Models
Some electric fireplaces are surface-mounted on the wall and need no framing at all. Others are partially recessed and require only a shallow frame. If you're considering this route, compare the trade-offs in our article on wall-mounted vs. insert vs. freestanding fireplaces.
| Insert Type | Framing Complexity | Typical Clearance Needs | Best For |
|---|---|---|---|
| Zero-Clearance Built-In | Low — standard wood framing | 0" to combustibles (verify manual) | New accent walls, media centers |
| Insert-Style (into existing) | Moderate — custom surround needed | Varies; often 1–3" around unit | Converting old wood or gas fireplaces |
| Recessed Wall Unit | Moderate — shallow cavity | 1–2" top and sides typical | Bedrooms, offices, small rooms |
| Freestanding | None | N/A | Renters, flexible layouts |
Tools and Materials You'll Need
Before you start, gather everything so you're not making mid-project trips to the hardware store. For a typical built-in electric insert frame, you'll need:
- Framing lumber: 2x4 or 2x6 kiln-dried studs (2x4 is standard for interior non-load-bearing walls)
- Fasteners: 3-inch framing nails or 3-inch construction screws
- Tools: Circular saw, framing square, level (4-foot), tape measure, drill/driver, stud finder
- Sheathing: Drywall, plywood, or cement board depending on your finish material
- Insulation: Optional but recommended for exterior walls to prevent drafts
- Safety gear: Safety glasses, hearing protection, work gloves
If you're planning to tile the surround, you'll want cement board rather than drywall as your substrate. Our guide on DIY fireplace tile covers the transition from framing to finished tile surface.
Step-by-Step: How to Frame for an Electric Fireplace Insert
The following steps assume you're building a new framed wall cavity for a zero-clearance built-in electric insert. Always consult your specific unit's installation manual first — it overrides any general guidance here.
1 Verify the Rough-In Dimensions
Every electric insert ships with a "rough-in" or "framing" dimension — the minimum opening the unit needs. This is different from the visible face size. For example, a unit with a 40-inch visible width might only need a 38-inch rough opening. Measure the insert's chassis, not its trim, and add the manufacturer's specified clearance on all sides.
2 Plan the Wall Location and Layout
Choose a wall that can accommodate the depth of the insert plus framing. Most electric inserts are 6 to 12 inches deep, so a 2x4 wall (3.5 inches actual depth) plus a bump-out is often required. Mark the centerline of the fireplace on the floor and transfer it to the wall using a plumb line or laser level.
Use a stud finder to locate existing studs and plan how your new framing will tie into them. For a media wall combining the fireplace with a TV, review our electric fireplace wall ideas with TV for layout inspiration.
3 Build the Base Plate and Header
Cut a bottom plate and a top plate from your 2x4 lumber, sized to the width of the framed opening plus the width of the side studs. Nail or screw the bottom plate to the floor (or to the subfloor through the finished floor if you're building on top of it) and the top plate to the ceiling joists or to a horizontal blocking member.
4 Install the Side Studs (King and Jack Studs)
Install full-height "king" studs at the outer edges of your frame, then "jack" studs (also called trimmer studs) inside them to define the rough opening. The distance between the jack studs should equal the insert's required rough-in width. Check for plumb on both sides before fastening.
5 Add the Header
The header spans the top of the rough opening and carries any load from above (though most interior non-load-bearing walls have minimal load). For openings up to 4 feet wide, a doubled 2x4 or 2x6 header is typically sufficient. Fasten the header to the jack studs with screws or nails.
6 Frame the Bottom Support (If Needed)
Some inserts sit on a shelf or sill plate at the bottom of the opening; others hang from the header. Check your manual. If a sill is required, install a horizontal 2x4 between the jack studs at the correct height, ensuring it's level.
7 Add Blocking for the Electrical Connection
Electric inserts need a power source. Most plug into a standard 120V outlet, but some higher-output models require a dedicated circuit. Install blocking near the insert's junction box location so you have a solid surface to mount an outlet or hardwire a connection. Our guide on plug-and-play electric fireplace installation explains the wiring options.
8 Verify Square, Plumb, and Level
Before closing anything up, measure the diagonals of your rough opening. If they match, the frame is square. Check plumb on both side studs and level on the header and sill. Any error here will be visible in the finished surround.
⚠️ Safety Note: Even though electric inserts are zero-clearance, never block the intake or exhaust vents on the unit. Restricting airflow can cause the unit to overheat and shut down — or worse, create a fire hazard. Follow the manual's clearance spec exactly, and if the manual says 2 inches on top, give it 2 inches, not 1.5.
Framing for Different Installation Scenarios
Framing a Media Wall with TV Above
One of the most popular configurations is an electric insert framed into a media wall with a TV mounted above. The key consideration is heat: even though electric inserts are cooler than gas, rising warm air can affect electronics over time. Many modern inserts are designed with a front-facing heater that directs heat forward rather than upward, making them safe for TV-above installations. Check the manual's TV clearance spec, and consider a mantel or shelf between the two. For layout options, see our built-in entertainment center with electric fireplace guide.
Framing into an Existing Fireplace Opening
If you're converting an old wood-burning or gas fireplace, you'll frame inside the existing firebox or seal it off and frame in front. This usually requires a custom surround to cover the transition. Our article on electric fireplace inserts into wood-burning fireplaces covers the conversion in depth, and converting a wood-burning fireplace to electric explains the decision process.
Framing a Corner Installation
Corner installs require angled framing — typically a 45-degree wall section. The rough opening is framed into the angled face, and the side studs are cut to match the angle. Our guide on corner electric fireplaces with mantels shows how these look when finished.
Clearance Requirements: What the Manual Actually Means
Every electric insert manual includes a clearance diagram. Here's how to read it:
- Top clearance: Distance from the top of the insert's chassis to any combustible material above. Often 0" for zero-clearance units, but sometimes 1–3" for units with top-vented heaters.
- Side clearance: Distance from the sides to framing. Usually 0" for zero-clearance, but check for units with side-mounted controls.
- Bottom clearance: Distance from the base to the floor or sill. Often 0", but some units require a raised base for airflow.
- Front clearance: Distance from the glass to furniture, curtains, or rugs. Typically 36 inches, but this is about safety from the heater, not framing.
When in doubt, add an extra half-inch. It's far easier to shim a slightly oversized opening than to rebuild a frame that's too tight. For general sizing guidance, see our how to size a fireplace article.
Finishing the Frame: From Rough Opening to Finished Wall
Once the frame is built and verified, you'll close it in with your chosen substrate. Drywall is the most common and works well under paint or wallpaper. Cement board is required if you're tiling. Plywood or MDF can be used if you're building a cabinet-style surround.
After the substrate, apply your finish: tile, stone veneer, shiplap, or a painted surface. The finished opening should overlap the insert's face by about 1 inch on all sides to hide the rough edge. Our DIY fireplace surround for electric fireplace guide walks through the finishing stage.
If you're building a full wall unit with shelves or cabinets, our DIY fireplace frame article covers the cabinetry integration.
Ready to Choose Your Electric Fireplace Insert?
Once your frame is planned, the next step is picking the right unit. Browse our recommended electric fireplace inserts below — selected for reliability, realistic flame quality, and easy installation.
View Recommended InsertsCommon Framing Mistakes to Avoid
- Framing to the visible size instead of the rough-in size: The visible face is larger than the chassis. Always frame to the rough opening.
- Forgetting the electrical rough-in: Running the outlet or hardwire connection after the wall is closed means cutting into finished drywall.
- Ignoring the manual's clearances: "Zero-clearance" still has conditions. Read the fine print.
- Building out of square: A frame that's off by half an inch will show in the trim and tile.
- Not planning for the finish material thickness: If your tile is 0.5" thick, your rough opening needs to account for that or the insert will sit proud of the wall.
If you're unsure whether to tackle this yourself or hire a pro, our DIY vs. professional fireplace installation comparison can help you decide.
Frequently Asked Questions
Can I frame an electric fireplace insert with 2x4 lumber?
Yes. In most cases, 2x4 lumber is sufficient for framing an electric fireplace insert, especially for zero-clearance units in a non-load-bearing interior wall. Use 2x6 if you need extra depth for the insert or want more room for insulation on an exterior wall.
Do I need a permit to frame for an electric fireplace insert?
Permit requirements vary by jurisdiction. In many areas, a simple electric insert installation that plugs into an existing outlet doesn't require a permit, but adding a new circuit or modifying wall structure might. Check with your local building department. Our fireplace permit requirements guide covers the general rules.
How much space do I need around an electric fireplace insert?
Most zero-clearance electric inserts require 0 inches to combustibles on the top and sides, but some models specify 1–3 inches. Always follow your specific unit's manual. The front clearance for furniture is typically 36 inches.
Can I put a TV above a framed electric fireplace insert?
In most cases, yes — especially with modern inserts that direct heat forward. Check the insert's manual for a TV clearance recommendation and consider a mantel as a heat barrier. See our TV above fireplace safety guide for details.
What's the difference between framing for an electric insert and a gas insert?
Gas inserts require venting (either direct-vent or B-vent), a gas line, and often stricter clearance to combustibles. Electric inserts need none of these — just a power source. This makes electric framing significantly simpler and more DIY-friendly.
How long does it take to frame for an electric fireplace insert?
For a straightforward built-in wall, framing typically takes 4–8 hours for a confident DIYer. Adding electrical rough-in, drywall, and finishing extends the project to a weekend or more. Our fireplace installation time guide has more detail.
Final Thoughts
Framing for an electric fireplace insert is one of the most approachable home improvement projects you can take on. With basic carpentry skills, a few tools, and careful attention to the manufacturer's rough-in dimensions, you can create a built-in feature that looks custom and adds real value to your space. The key is to measure twice, check your clearances, and plan the electrical before you close up the wall.
Once your frame is ready, choosing the right insert is the fun part. The products below are selected for their realistic flame presentation, heating performance, and ease of installation into a standard framed opening.